Mother’s day is celebrated across the world and as tradition goes next Sunday, 10th of May, mother’s are showered with flowers and cards, wishing them happiness and love. But as I happen to live about a half an European continent away from my mother, I found a way to combine the two. Meet pop-up flower bouquet, fully made of paper, that easily fits into an envelope!
Not to take credit from others, I did not come up with this fabulous idea myself but came across it when browsing through Pinterest the other day, and it happens to be that internet is full of instructions and know-hows on how to make one. It even has it’s own Wiki-how page here. Don’t be alarmed by the numerous steps and hoops you need to jump through to create this card, but look it as a challenge. As long as you are precise and read through the instructions carefully you will most definitely succeed. And as it was my first time trying this out, my photos might not be the most detailed or helpful, so check out the elaborate 25-step guide. I’ll walk you through the process and give helpful tips that might increase your changes of succeeding better than me 🙂
I’m glad my mother is understanding, and half of the mother’s day charm is that nothings needs to perfect. But don’t stress out, and make it look like your own!
What you’ll need:
– Paper: 80gsm for the flowers and leaves, 200gsm for the card
– Scissors, tiny ones work better
– Paper glue, see-through and fast drying
– Nerves of steel !
What you’ll do:
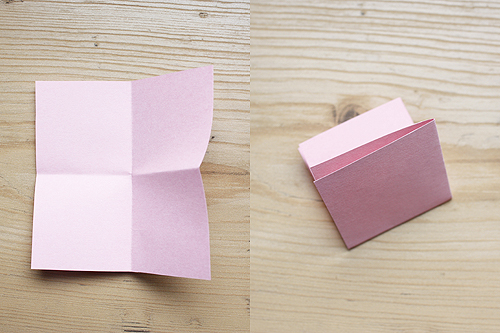
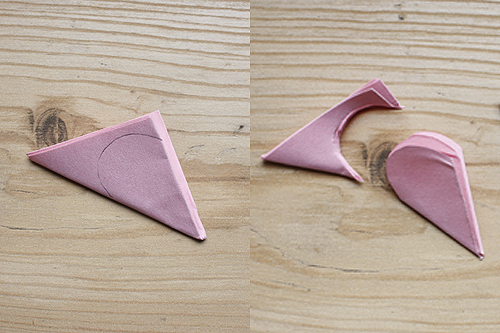
1. Cut the paper into 7 cm x 7 cm squares. 2 of 2 different colors, and 3 of the third color (this will be the one in the middle also). Fold the squares over twice, and then a third time to form a triangle. See photo below.
The first part is easy, but remember to be precise. You need to cut very straight to make the last steps easier
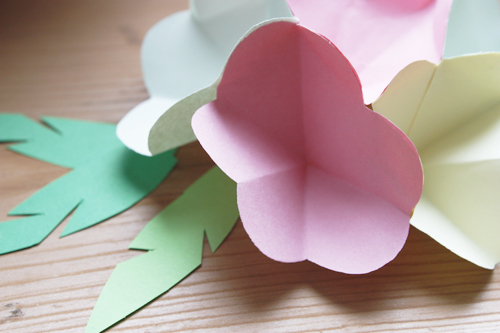
3. Draw a line on one side, this will the shape of the petal. Make it symmetrical (very important!). Cut it in shape. Use the first petal as a stencil for the others, so they will all be in the exact same shape (very important!).
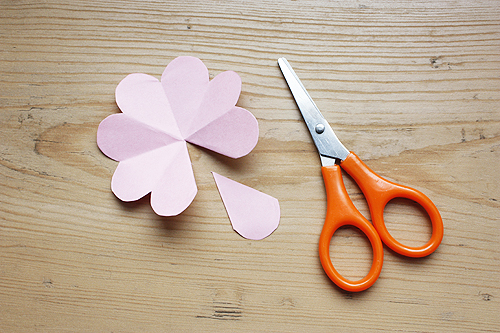
4. Open each square, which are now in shape of a flower. Cut out one 1/8 of the flower, exactly one petal. See photo.
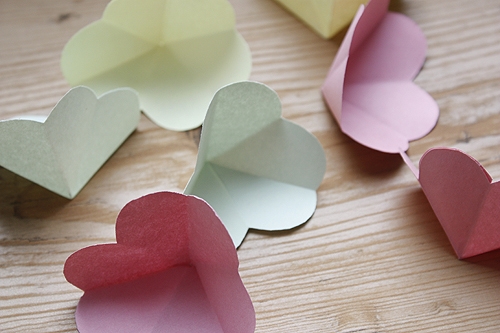
5. Glue the flowers by over lapping the petals. See photo.
6. Now, go to the guide here, step 15. This will show you how to exactly place and glue the flowers together.
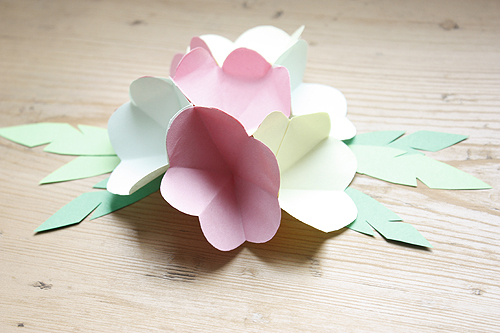
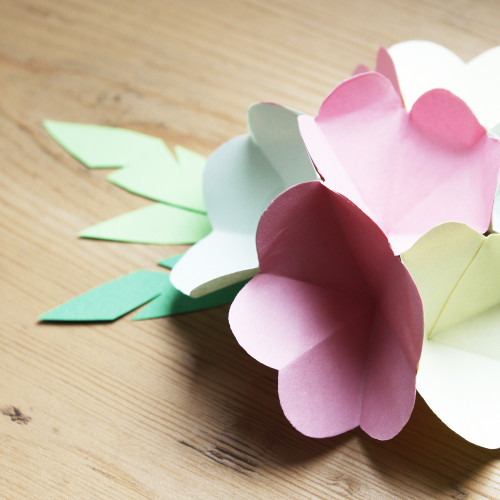
7. Once all the flowers are glued together, you fold them in place, and attach it to the card. If you wish you can all leaves as well. And Ba dam! You are done!