

Let’s go Cuckoo this Carnival! The end of Carnival season is upon us, and Lent, which will lead all the way to Easter is about to start. And this means for most of us in Austria, that it’s time to get dressed up, head to the streets and party till the sun comes up. And if you are one of the many heading out tonight, I came up with a great and fun way for you to dress up – DIY Colorful Cuckoo Masks made of paper.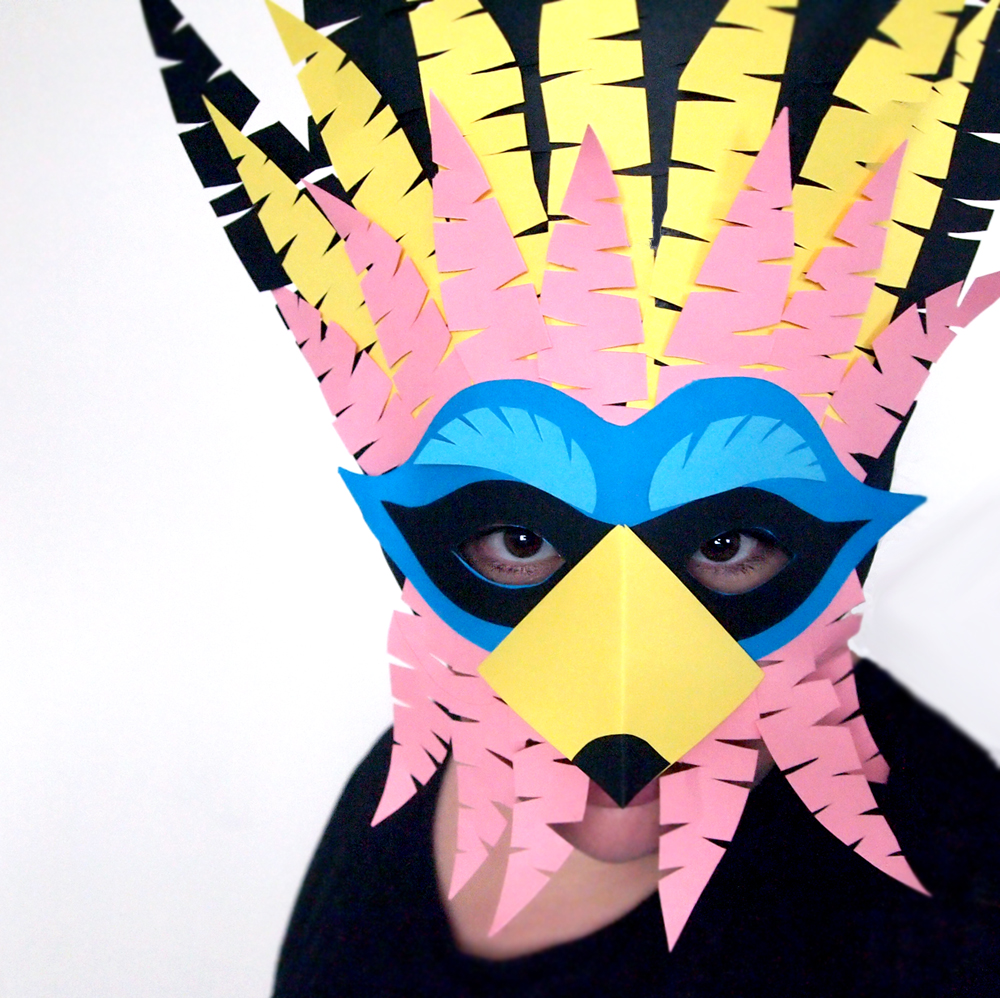
There is a huge variety of customs and traditions associated with Carnival celebrations in the German-speaking countries of Austria, Switzerland and Germany. They all vary considerably from country to country. In Austria, Carnival is called Fasching, referring to these festivities occurring before Lent. The carnival season begins each year on the 11th of November at 11:11 a.m. and finishes today on Fashingsdienstag, which is characterized by music, dancing, wearing of masks, masked parades, wearing clothing of the opposite gender, silliness and general mischief.
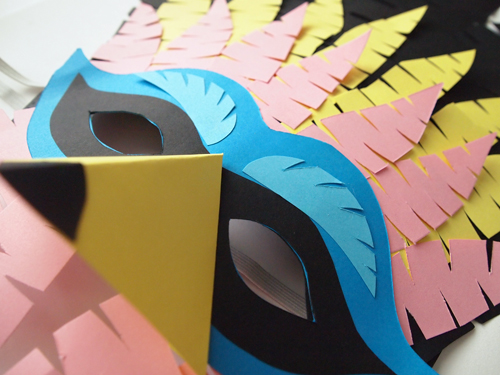
Inspired by the traditional Austrian Cuckoo Clocks as well as the spring which has brought the birds back into the city, I made some feathery Cuckoo Masks. Of course, as always you can make them in any color you wish, but in the spirit of Carnival, I went all out with color options. With all the needed supplies handy, it takes about 20 to 30 minutes to finish one mask.
What you’ll need:
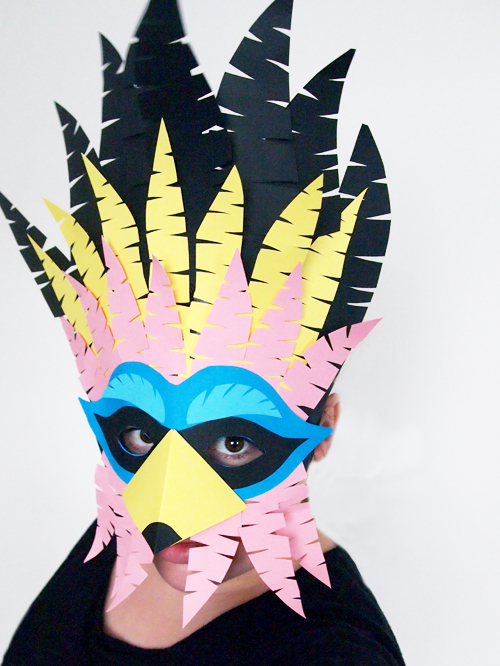
Paper in your desired color palette, I used IQ Color pink, canary yellow, spring green, aqua blue, dark blue and black in 80 and 120gsm. (all exclusively available at Europapier). I used 2 A4s of each color. Paper cutter, strong glue and some elastic for the headband.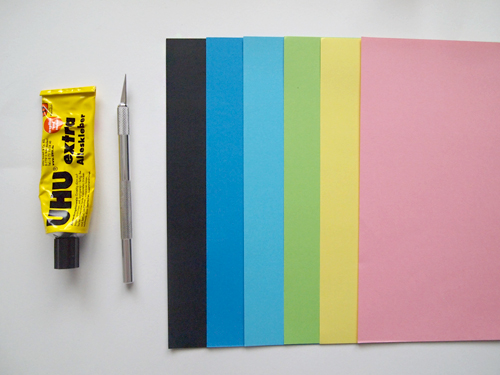
What you’ll do:
1.You’ll start off by cutting the mask, I did this by gut feeling. Cut it approximately in the shape (see below), try it on and adjust. Remember to cut the eye holes, as they will come handy later 😉
*Easier way it so use a ready made mask as the base.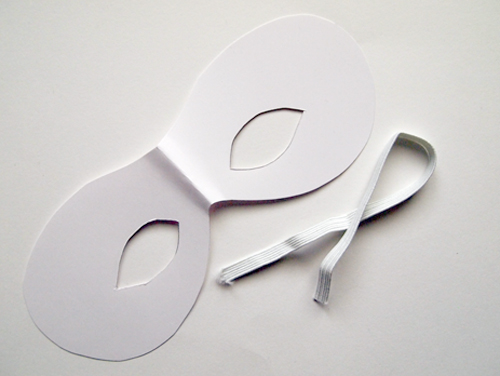
2.Cut as many “feathers” as you think you’ll need. I used about 30 on each mask. Different sizes and different colors make a cool effect. Plan out ahead what style you wish to make and try out the arrangement so you’ll know what order to glue them on, and the exact number you’ll need. Obviously the longer feathers go on first, to create a layered look.
*To cut many feathers at the same time, fold the A4 paper into as many layers you wish to make. First cut the general shape, then using the cutter, make small cuts on the sides in an up-right direction, giving it a feathery look.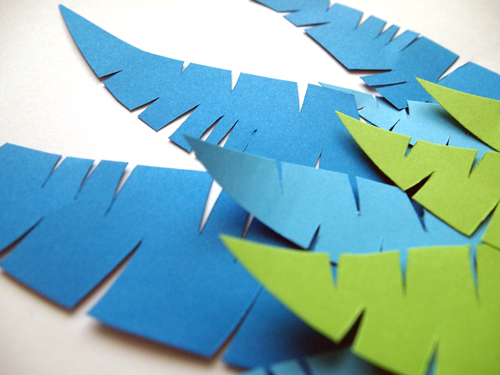
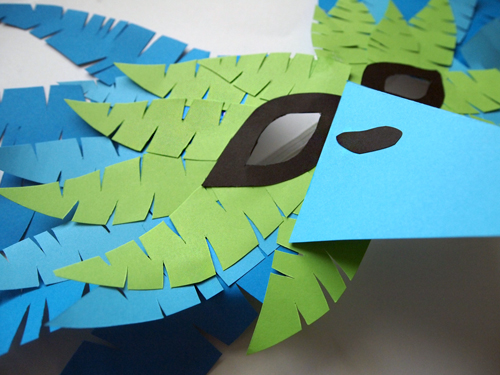
3.Glue on the feathers. Don’t be shy with the glue, the feathers need to stay on throughout the whole night! You can also cover the area around the eyes with a smaller mask to hide “the ends” of the feathers, and give it a more bird-like look and feel. I even made some eyebrows for the other one!
*Don’t mind if the feathers cover the eye holes as you are gluing them, just make sure the layout looks nice. This is when the ready-cut holes come in handy. Just flip the mask over and you’ll see the original holes. Cut them out again along the outlines with a cutter knife.
4.Make the peak. It’s roughly a diamond shape, which you’ll fond in half creating the 3D triangle shape for the peak. Remember to leave small strips of paper on two edges which you’ll fold and use to attach it to the mask. See photo below. Give the peak some detail. Glue it in place.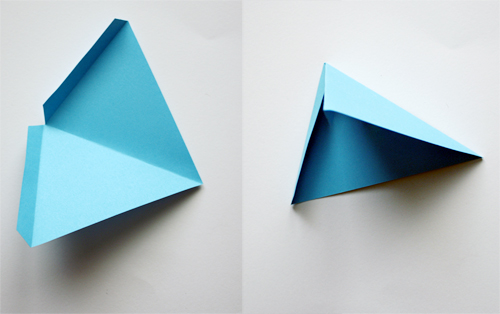
5.Attach the elastic band. Remember to measure the length around your head first, then either attach it with staples or punch holes in which to pull the elastic through.
Voilà! Put the mask on, head out and have a marvellous time!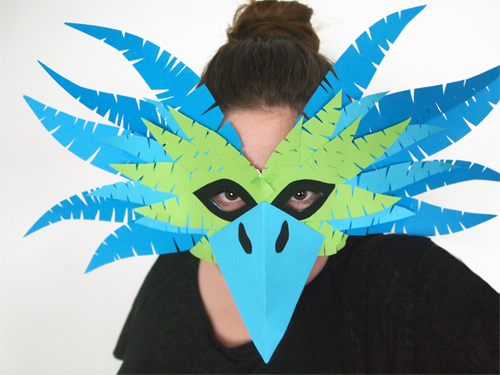
Happy Carnival Everyone!