

Our editor Sini, who’s responsible for all of our Design & Paper DIYs, has gone crazy over Tyvek® Soft. The paper like material, which we wrote about few weeks ago, which is used for multiple purposes from packaging to furniture, is also perfect for sewing garments and handy crafts. Taking the classic, a white t-shirt, Sini made a new version of it out of Tyvek®. So here’s our very first fashion DIY, check out the step-by-step instructions on how to make your own!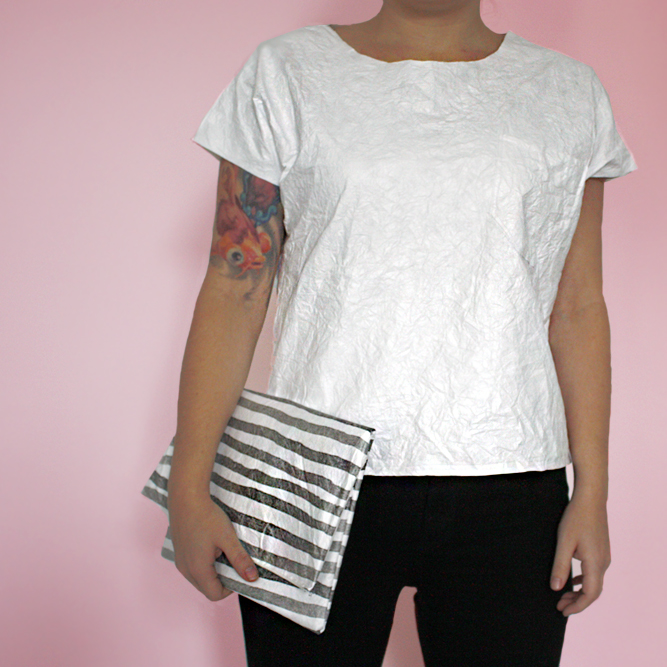
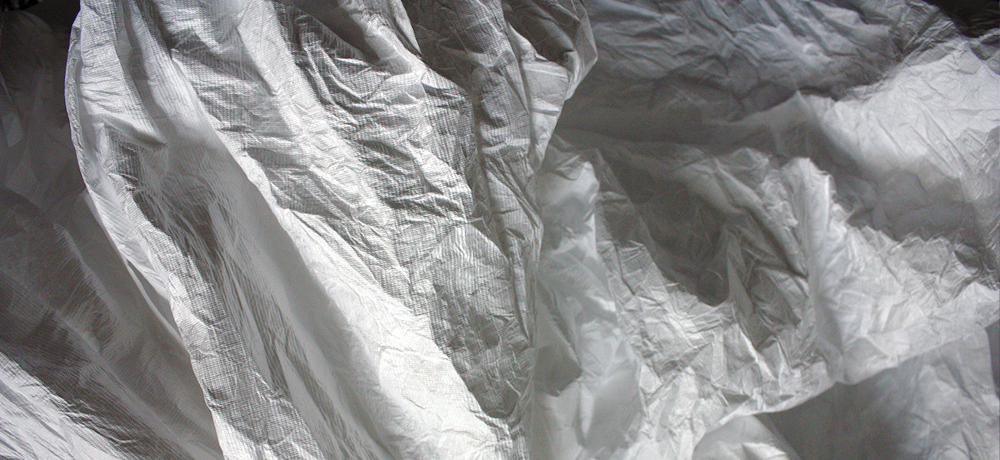
The naturally white, tear-resistant and durable construction of Tyvek® is fully breathable yet water resistant. The special construction of the material gives it a fabric-like feel, with a paper look. But don’t let the crumpled look fool you, it feels very soft against the skin and behaves the same way than any other woven, non-strechy material, making it easy to cut and sow. Although Tyvek® in fashion is most often used for outerwear, accessories and technical garments, it’s very suitable for basic clothing as well, such as t-shirts.
The t-shirt, which gained popularity after the Second World War, dates back to the beginning of the 19th century. Originally worn as undershirts, pop culture stars such as Marlon Brando and Elvis in the 1950s made it fashionable among the teenagers. The t-shirt became a means for self expression as well as advertising, and is known as the most popular and versatile piece of garment in the history of fashion. The classic white t-shirt is worn by all ages and races, across the world. So it was only fitting, it would be the first garment for me to do out of Tyvek®.
This DIY is quite easy if you have previous experience with sowing and cutting simple patterns, but also the perfect first project for a beginner. As everyone has a different body shape and size, finding the best fitting t-shirt is always slightly difficult. The easiest thing to do is to walk up to your closet, find an existing t-shirt to use as the base pattern. Of course for more experienced sewers, making the pattern from body measurements is also an option. Depending on the size, you’ll need approximately 1-1.3m2 (girls medium size) of Tyvek® for the shirt.
Giving my own twist on the design, I oppted for a simple cut, slighly cropped with rolled-up sleeves and a front pocket. As the pattern was only in two parts, front and back, it was quite simple to cut and sew. I would recommend trying this shape first, as fitting a sleeve pattern is a little bit more tricky.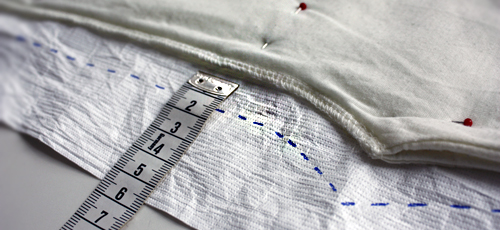
1. Place the t-shirt on top of double layered tyvek® and draw out the outlines, leaving 1-1.5cm for stiching. Make sure you have the wrong side (inside) of the material on top, so you wont have to turn it afterwards. Remember to pin the t-shirt to the Tyvek® to prevent it from moving while drawing.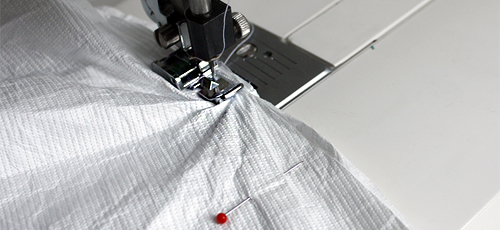
2. First sew the weistband. You only need to turn it once, and no double stiching is nesseccary as Tyvek does not unravel. Just make it clean and straight. Longer, 2-3mm stiching works fine.
3. Sew the shoulder lines, and then the sides. If you are sewing for yourself, make sure to try the shirt on, making sure no big measurement issues have been made.
Done!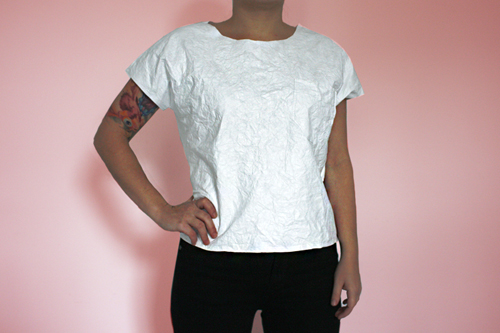
More experienced sewers can make a little front pocket, a small collar or anything that comes to mind. Make it exactly how you wish! After finishing, crumble up the whole shirt to give it an even crumbly look! If you have any questions about the DIY, don’t be shy to ask in the comments below 🙂
I also experimented with painting stripes on the Tyvek® with indian ink, and it turned out very well. I used the striped piece to sow a small clutch, which doubles as an iPad cover, but more on that next week! Stay tuned for the next Tyvek® DIY!