Valentines Day is coming up in few weeks, and as the tradition goes, it’s time to craft up something cute and lovely. This year I’m all about cut-outs. This DIY is the first of a few in that theme, so stay tuned for the upcoming weeks. I love how simple and clever this DIY is, and it’s also super easy to modify in your own personal style and colors. Check out the instructions below and get crafting!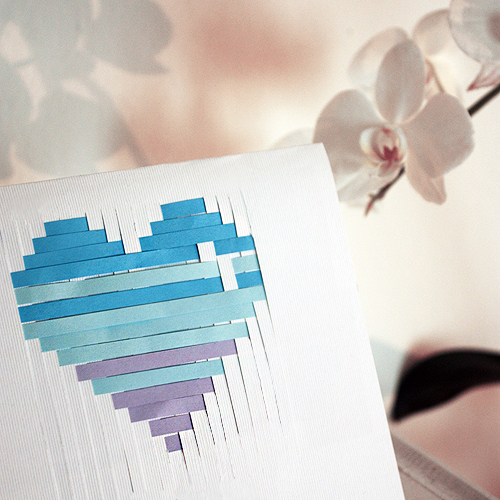
First of all, this DIY works for cards, posters and any other Valentines Day themed decoration you wish to make. It all depends on the scale you make it. I happened to have a bag of ready cut quilling papers left from previous DIYs, so that pretty much determined the size for me. Quilling paper is perfect for it, as it’s already cut in straight strips of paper, and usually comes in multiple different colors in one bag. In case you don’t have any of these special papers handy, do not worry, just cut up any paper you have, into strips! To tell you the truth, something with a higher gsm than the quilling paper might work better, maybe something closer to 220 gsm. You can see in the photos how the paper gets easily crumpled.
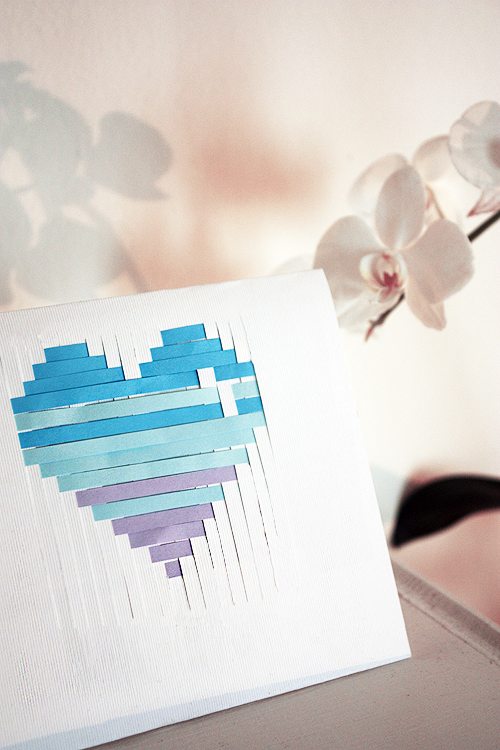
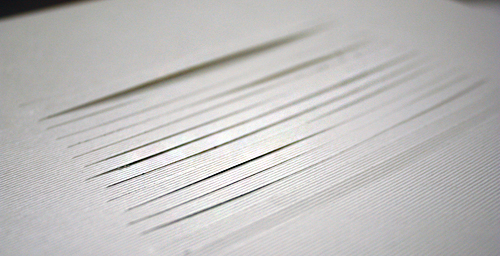
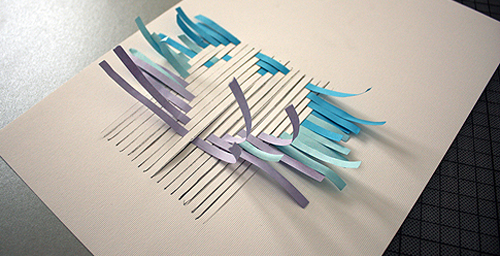
So, you need a paper for the base, for my card I used extra white Twill in 240 gsm from Europapier which has a nice linear texture. I cut the card approximately 15cm x 30cm, so I was able to fold it in half later. In the middle of the card, cut 16 lines in a vertical manner in the same width as the strips of paper you are using. Example: the quilling paper I used (see below) is 5mm wide, to I made cuts every half centimeter.
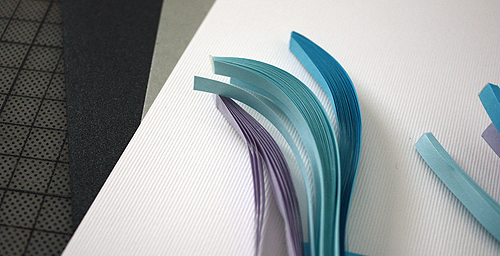
When you’ve finished slicing the paper, start laying the strips of paper inside the cuts, as shown in the picture below. Use different color combinations, fading, stripes or just monotone. I did a three-color combination of blue, light blue and purple, just to get away from the usual colors of Valentines day, pink and red. And it turned out quite lovely. Remember to cut, organize and either glue or tape the paper strips down to the base card, to prevent them from slipping off. Also, it makes the finish look a lot more cleaner and even. I found tape being the easiest solution for it.
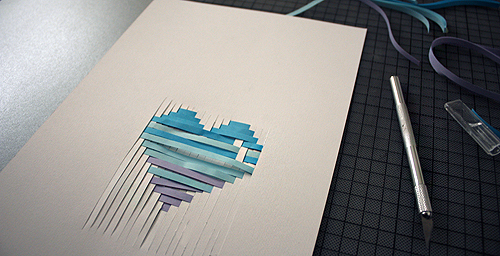
I really, really love the outcome, and figured out it’s perfect for my boyfriend. With more “boyish” colors, and a slight pixeled look it reminds me of the 80’s as well as video games!
Hope you have fun making the DIY, and as always, if you have any questions, don’t hesitate to write to me in the comment section below. And I’m always happy to hear suggestions on what kind of DIYs you would like to see me make!
PS New cut-out themed DIY coming up next week!