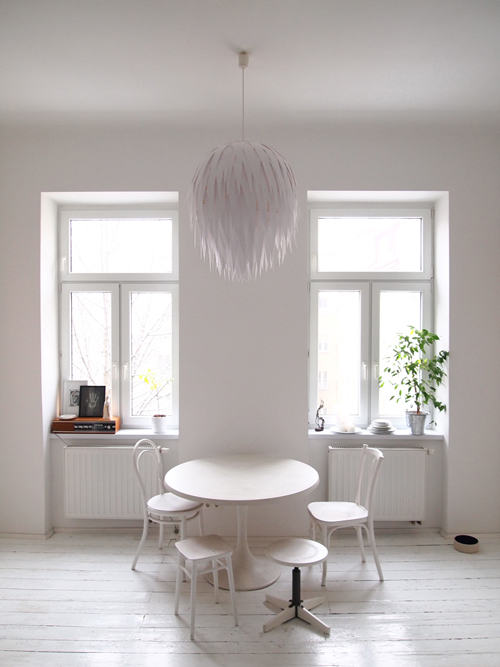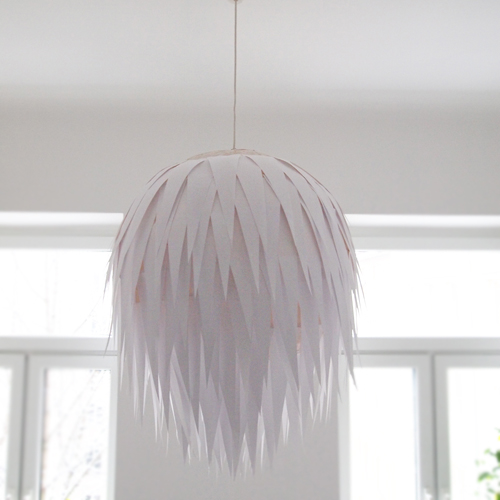
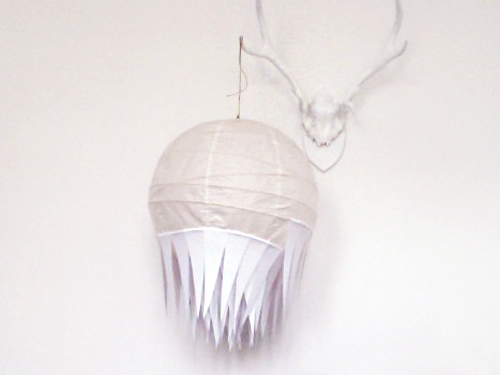
I love making DIY’s but honestly, I don’t enjoy a too crafty or hand-made look. I believe, even thou you’ve made it yourself, it can look clean-cut, sophisticated and even expensive. So for a while now I’d been looking for a good DIY lamp shade for our living room. The room is 4 meters high and most of our interior is white, so I wanted to keep it cohesive and fitting to its surroundings. Then I saw a picture of the Paper Starburst Light by Allison Patrick on Pinterest and fell in love with it. I loved the simple but still intriguing shape of the lamp, and was very positively surprised to find out that it’s originally a DIY lamp shade.
With a short investigation I found out it had been featured in a few design blogs before and every time looked a bit different but still amazing (mine ended up looking more of an artichoke than stardust, hence the name). It has even made the cover of a contemporary craft lighting book called Illuminate. Even though it took me a whole afternoon to make and the process can be wearisome I recommend this D.I.Y. to everyone who can cut and glue. It’s as simple as that!
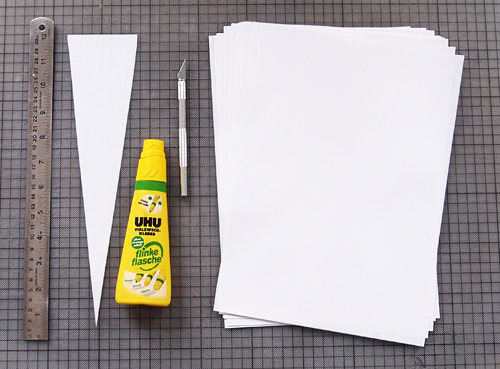
What you need:
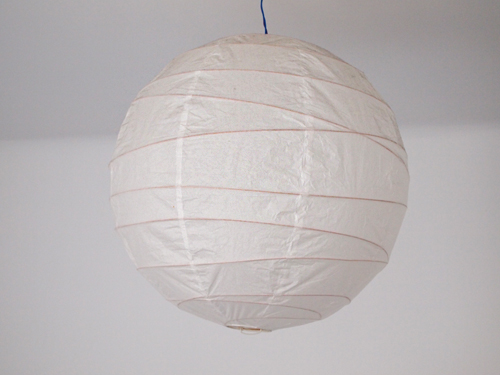
- 1 paper lantern; any size will do (the bigger the lantern, the more paper you need)
- paper (I used approx. 60-80 sheets of white A4 copy paper)
- paper cutter/scissors
- a ruler
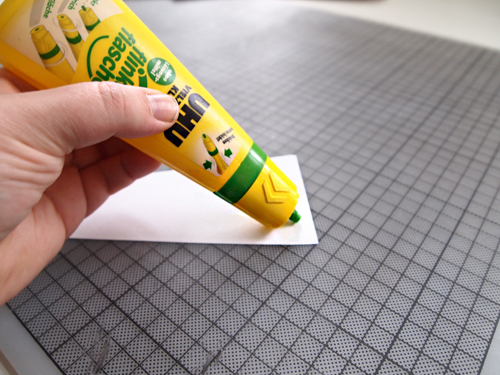
- glue
 Step 1.
Cut the paper in the chosen sized triangles with the help of a ruler (i.e. 8cm x 20cm). Remember to use an appropriate cutting surface, not to harm your tabletop!
Step 2.
Glue the triangles to the paper lantern from the bottom up! If the lantern has a wire inside the shade, it’s easy to follow it and keep the rows the same distance throughout the process. Remember to off-center each new row so that the spaces between each piece get covered with the overlap, this is more important at the widest part of the lantern. If there are some spaces showing at the end, you can just cover them with extra pieces of paper! When gluing the triangles to the lamp, it’s easier to have it hanging down or upside down in a bowl. I found it the easiest to hang it to eye level when you can turn and twirl it (see below).
Step 3.
Hang it up, hit the light switch and enjoy!