Sometimes the most simple DIYs are the most impressive in the end. This Colorful Folded Heart Wall Decal is a super easy project, so if you are a beginner or just looking for something simple and fast to decorate the house with for Valentine’s Day, this is the thing for you. It doesn’t get any simpler than this. Have fun and Happy Valentine’s Day everyone!
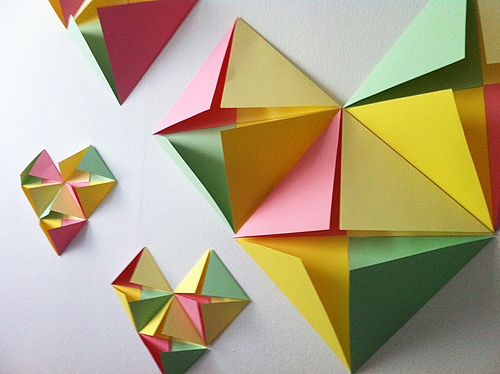
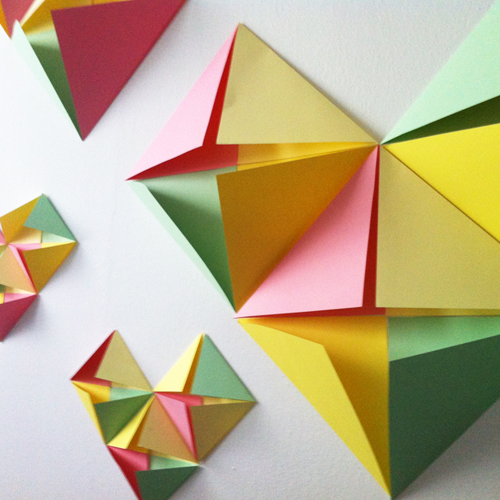
I love making big and grand DIYs but to be honest I don’t really have the use nor the room for them in my house. So when it comes to simple decorations you can put up for a couple of days for a specific holiday or a party, I’m all in. There’s multiple different versions of the DIY going around the internet and this is my version of it. As the whole project is simply about folding papers and sticking them on the wall in an arrangement you wish, you really can do what ever you want with it. In the Valentine’s Day fever, I opted for a heart <3
Also remember that everything is about scale! I wanted to do something as big as possible, so I made a wall decal with cut up and folded A4 sized papers. The bigger wall decals also make awesome backdrops for photo shoots, presentations and installations. But, you can use the same technique in smaller scale ie. making posters or decorating greeting cards.
What you’ll need:
Paper in your desired color palette, I used IQ Color pink, canary yellow, yellow and medium green in 120gsm
paper cutter/scissors
and some double sided tape.
First you cut the papers down into squares in your preferred size. The IQ Color papers from Europapier came in basic A4, so deciding size was simple, I just cut them into squares by folding the other end by the corner. This way you fold first and cut second. (I also made small triangles of the “left over” part). But if you want to also do a smaller size, which I recommend for a more interesting and variable finish, you cut the papers into even squares first, and then fold. For the heart you will only need one size. However you wish to do it, you should end up with a pile of folded paper triangles, like below. Remember to press the folds on a sturdy and flat surface, and ideally you should use something else than just your finger (the heat of your hand might stain or curl the paper). A ruler or a bone folder will give the best results.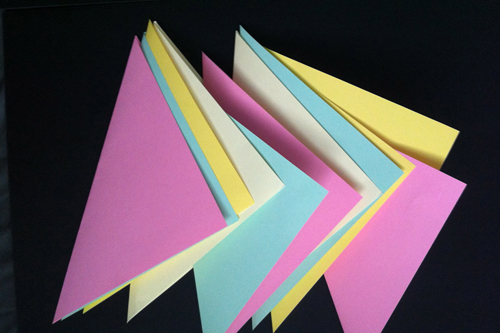
Once you are done with cutting and folding, it’s time to start sticking! And this is the time to get creative. Try out the heart pattern by simply imitating the picture below. You’ll need 12 triangles for each heart. And for a more random look, arrange the papers in an irregular geometric setting. See how big you can go!
If any of you end up trying the DIY, let us know how it turned out.
We’d love to see some photos!