Make your Christmas presents extra special this year by learning how to print your own beautiful gift wrapping paper. No other word goes hand-in-hand better with Christmas than homemade! You design your own DIY Advent Calendar, decorate the tree with Charming DIY Ornaments, create DIY Christmas Cards, and maybe even craft your own Alternative Christmas Tree. Making your own wrapping paper should be no exception – it’s fun, it’s cheap and it gives your gift that special, personal touch every one of your loved ones will appreciate.
Printing gift wrapping paper with patterned rollers is a great addition to the numerous techniques which exist for various skill-levels, from making stamps out of vegetables or erasers, to paper marbling or utilizing old scrap papers, magazines, and newspapers. The pattern rollers might be from the higher end of the skill-level ladder, but with these step-by-step instructions, it’ll be fun for the whole family.
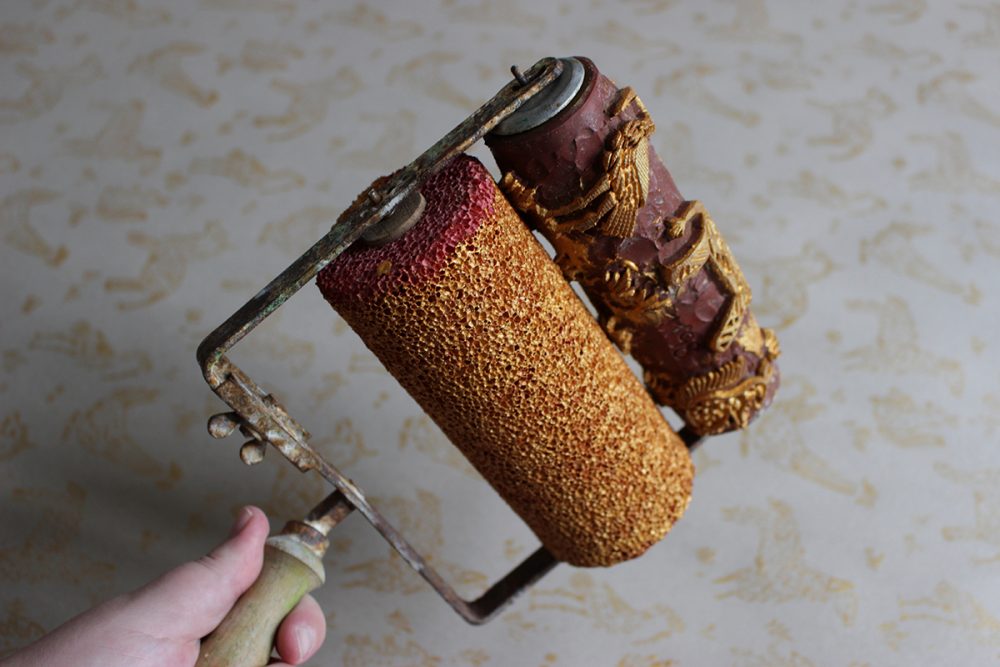
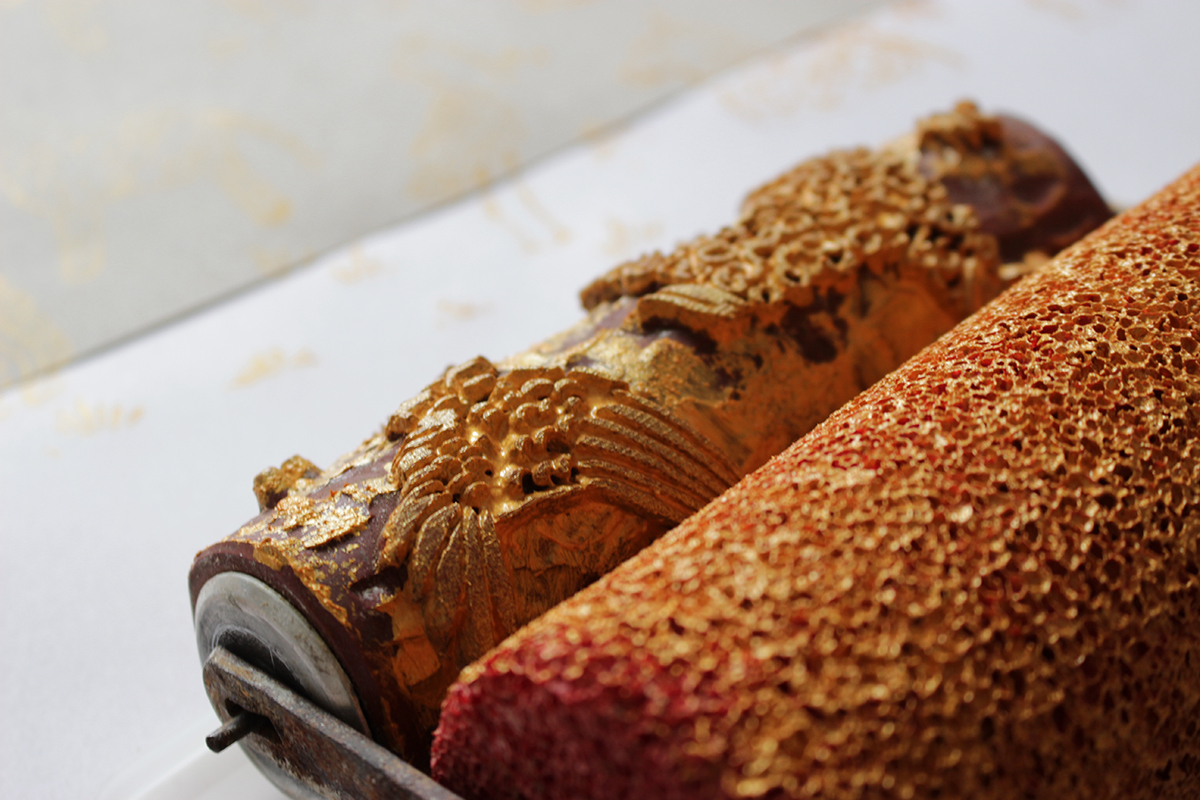
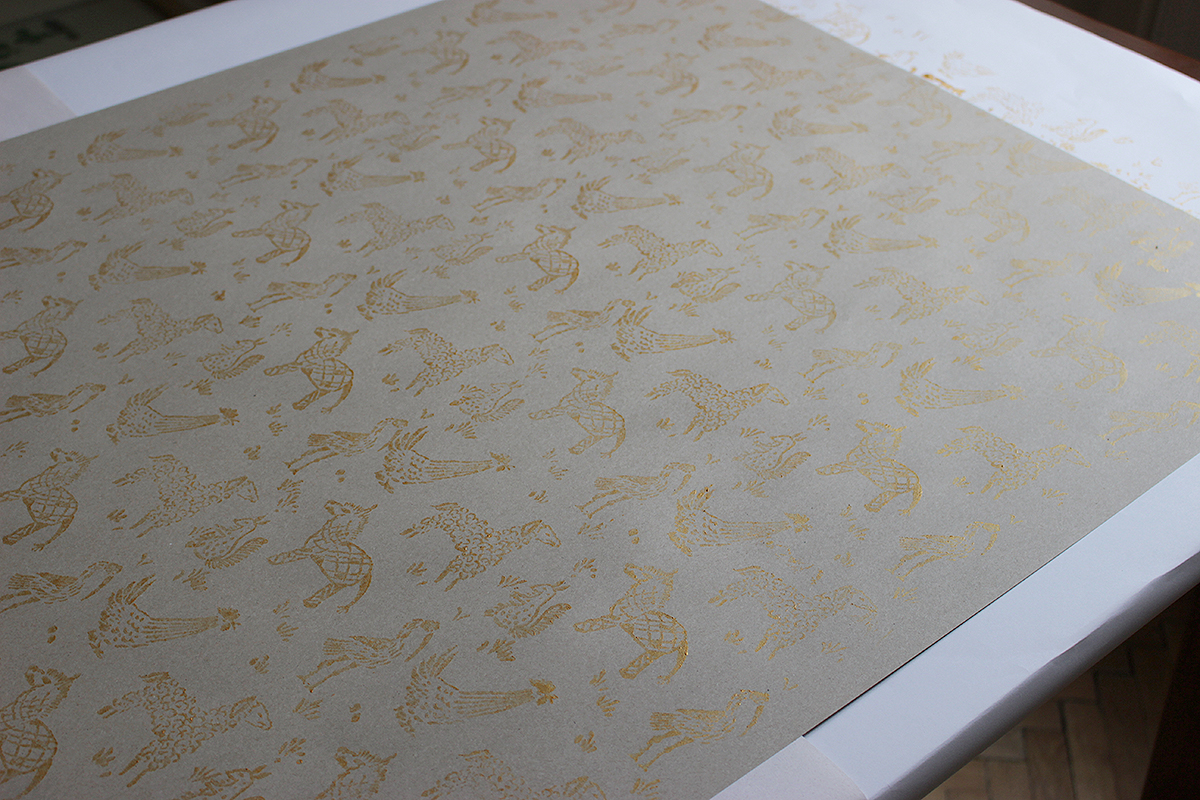
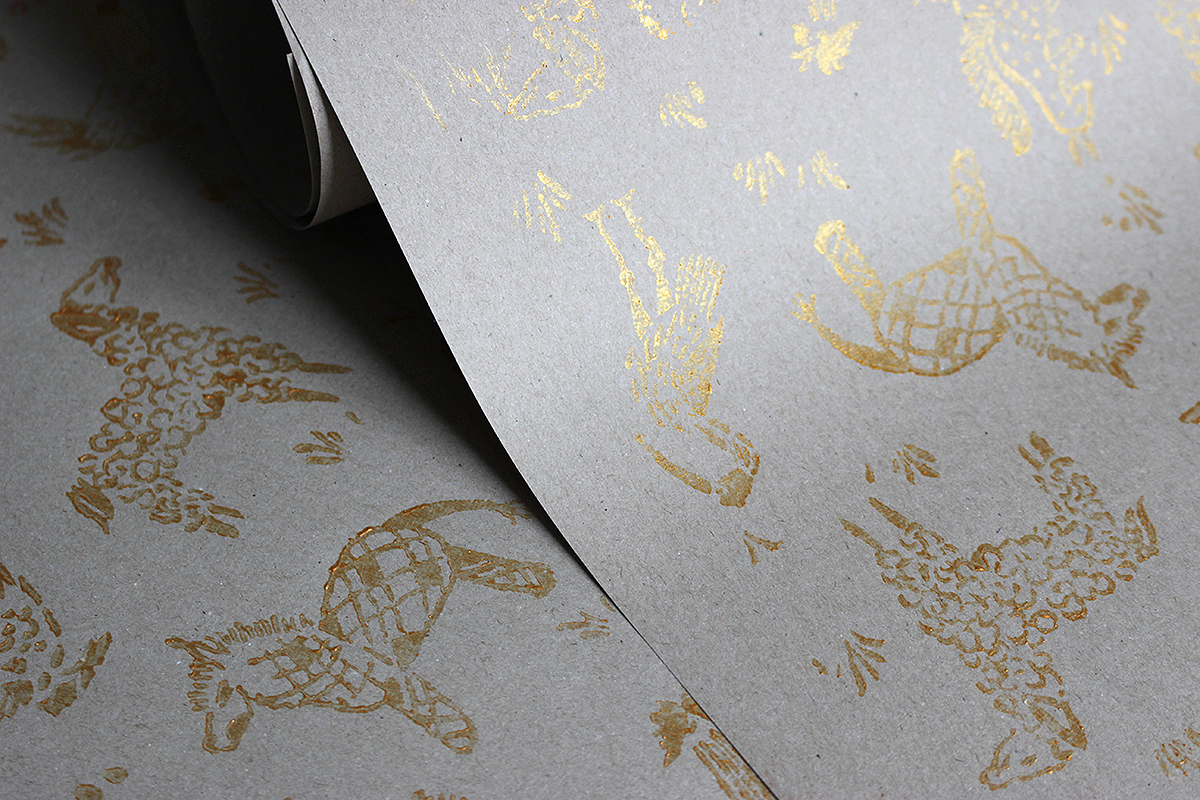
Vintage rubber rollers with a raised hand-embossed pattern
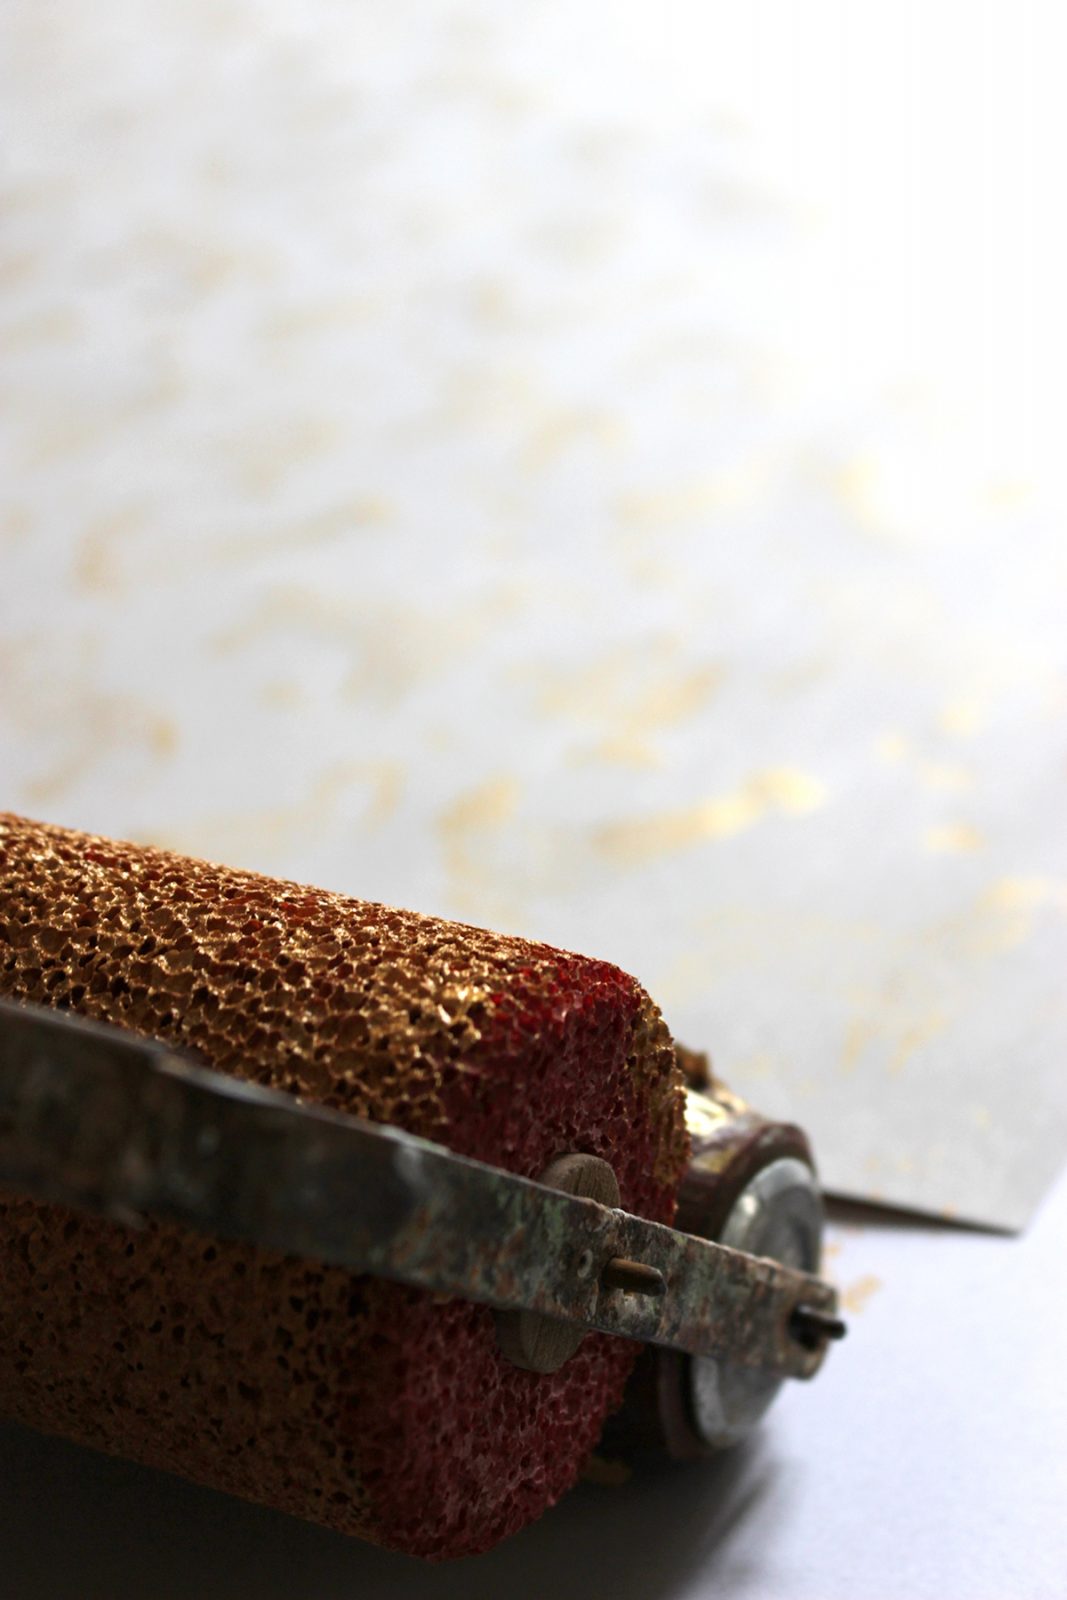
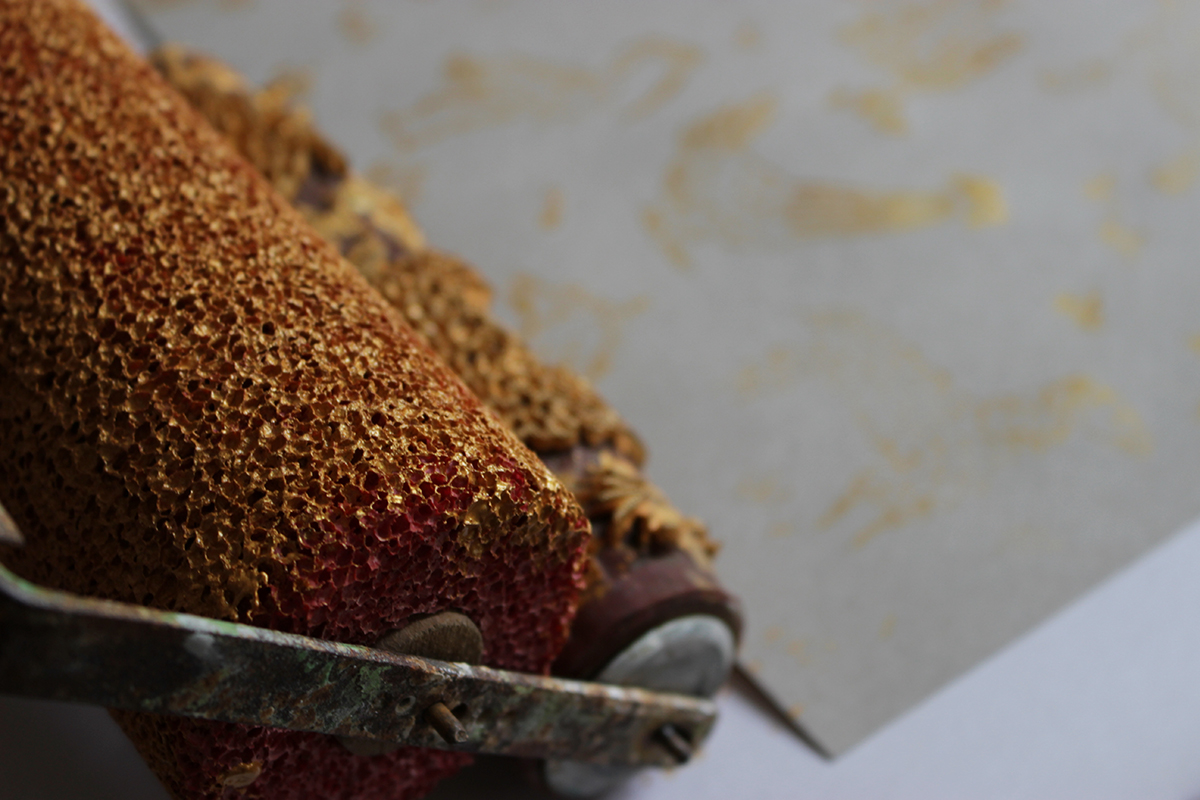
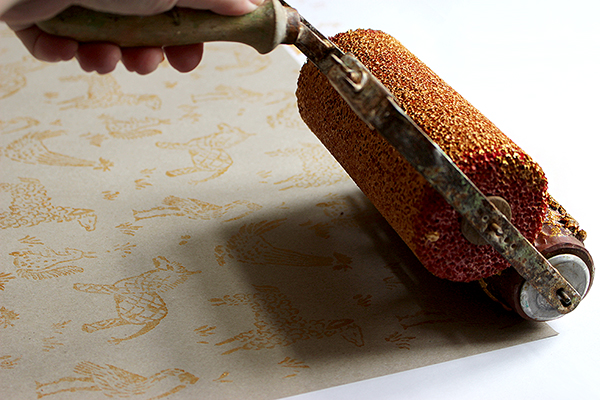
We got our hands on some vintage pattern paint rollers from the ’70s with designs fitting for the holidays. The 15cm wide rubber rollers have a raised hand-embossed pattern on its surface. The pattern roller is attached to an applicator, with a foam paint feeder roller, and a frame with a handle.
As you roll, the surface of the pattern roller picks up a thin layer of paint and transfers it on the surface you are painting. The rollers can be used in everything from walls to furniture to paper – which we are doing today.
You can find pattern rollers and applicators in most well-stocked hardware stores or painter supply shops, or you can order your own online here. If you’re lucky, you might find some handmade vintage gems like ours at flea markers or a storage sale.
Get creative with colors and papers!
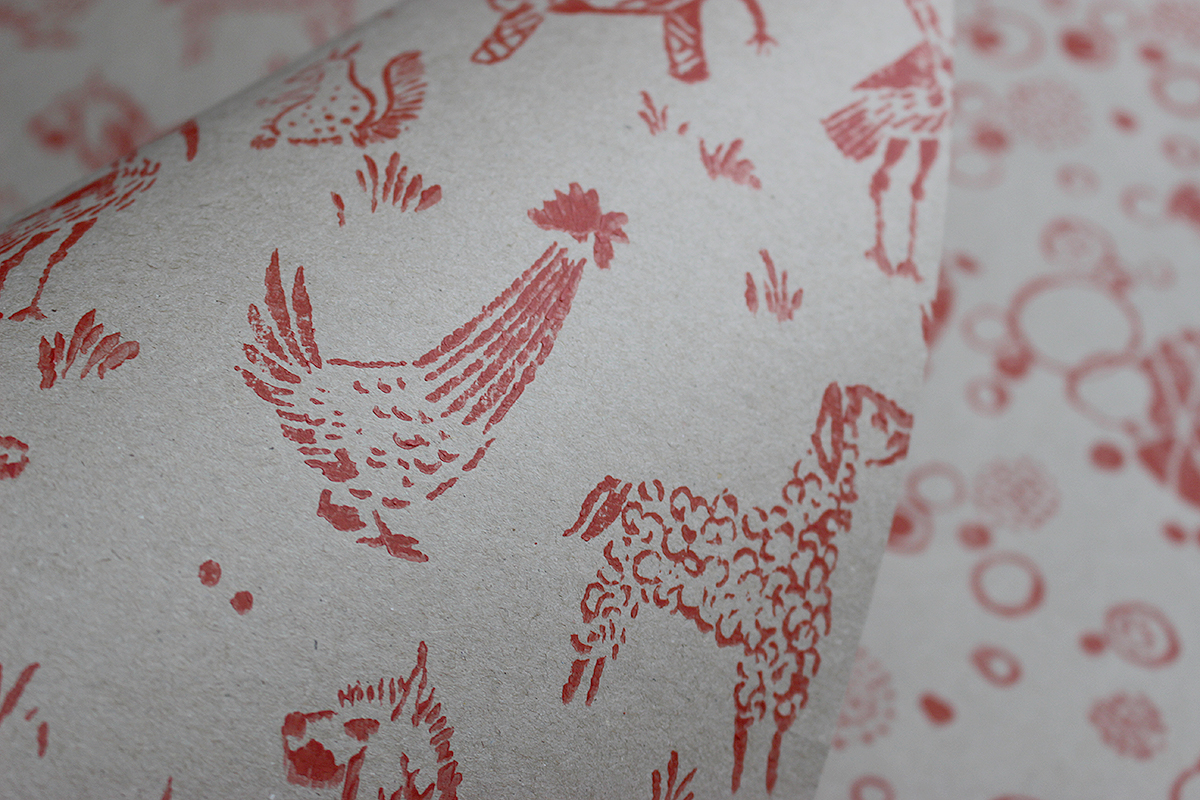
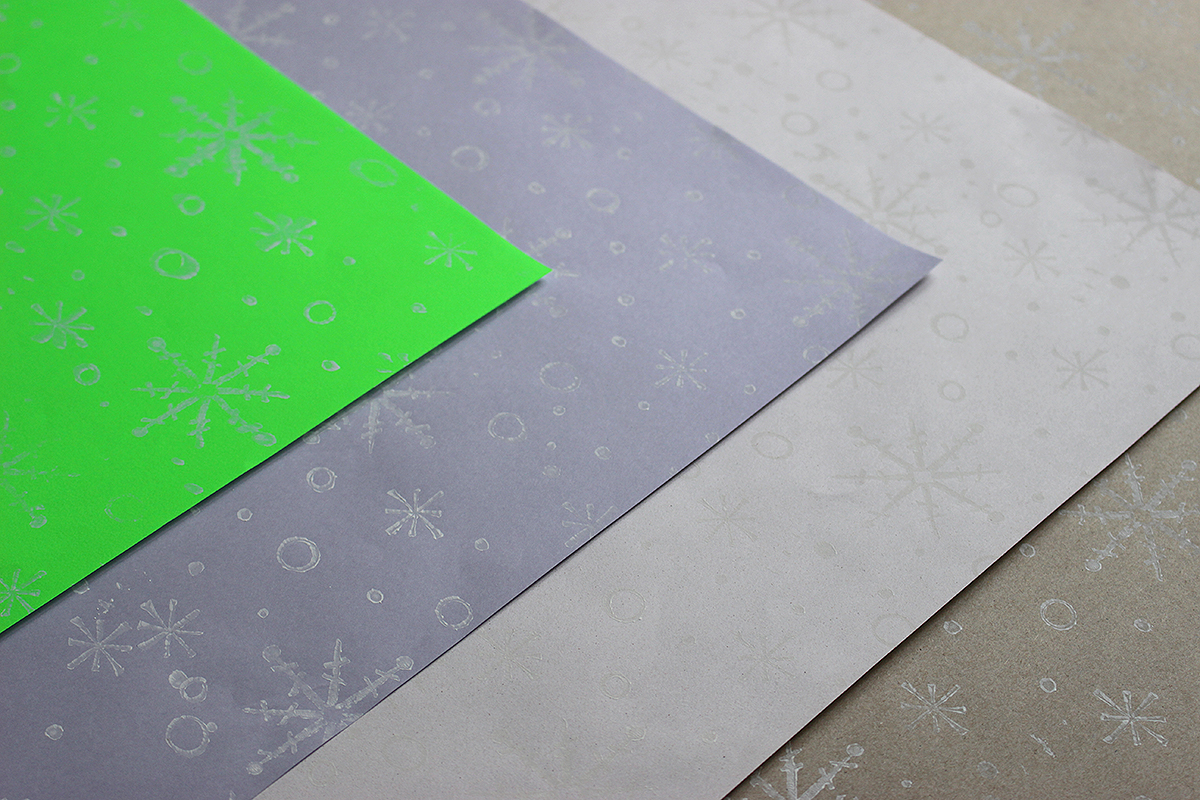
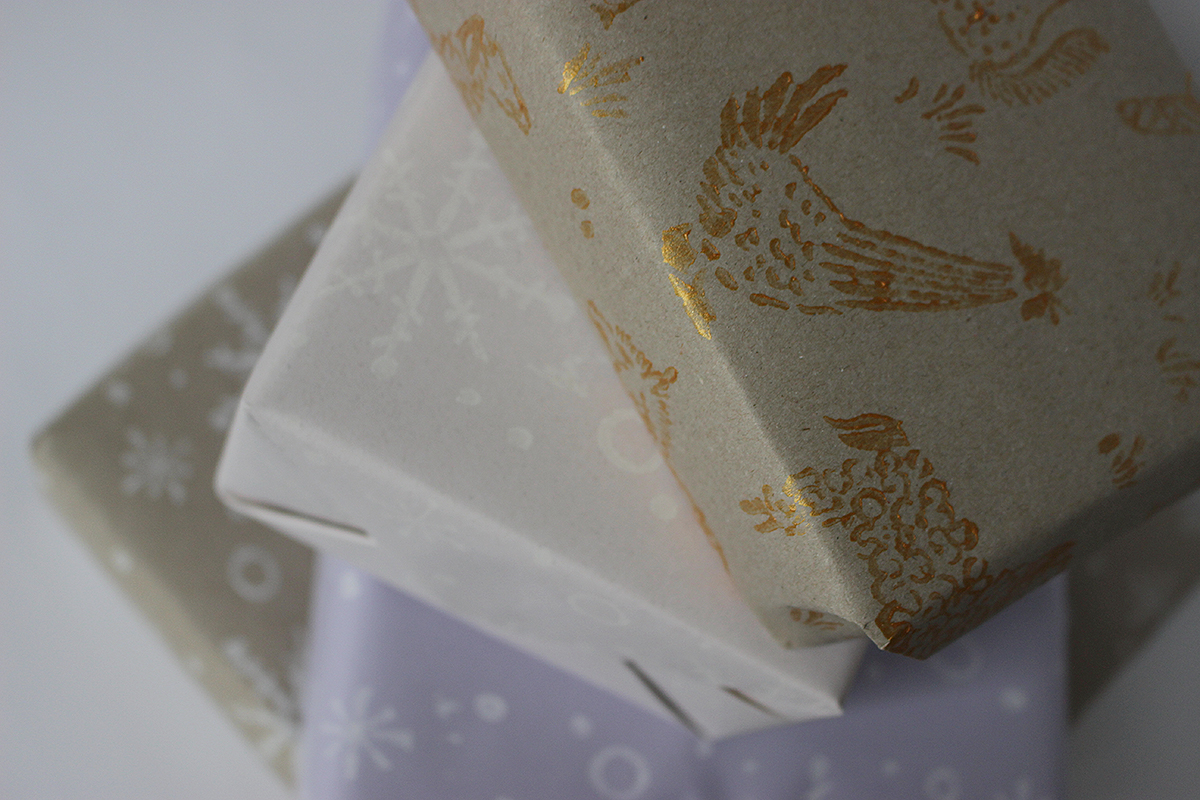
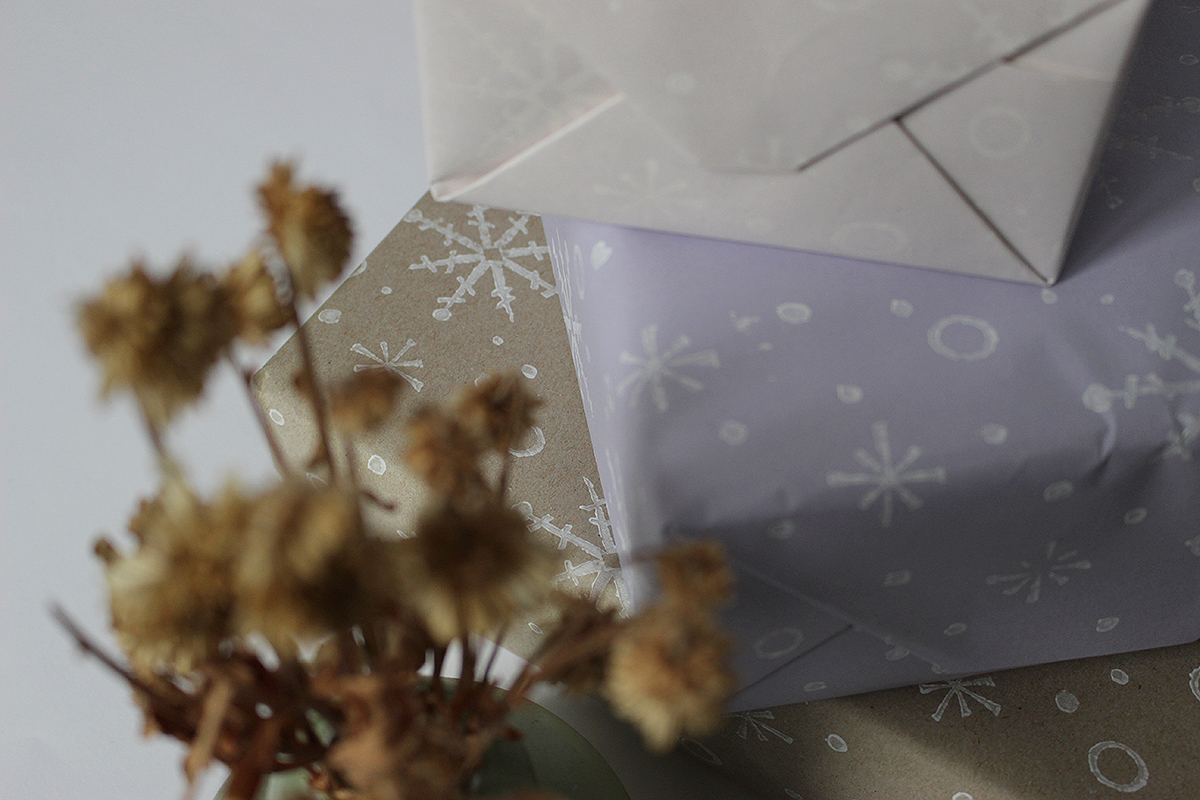
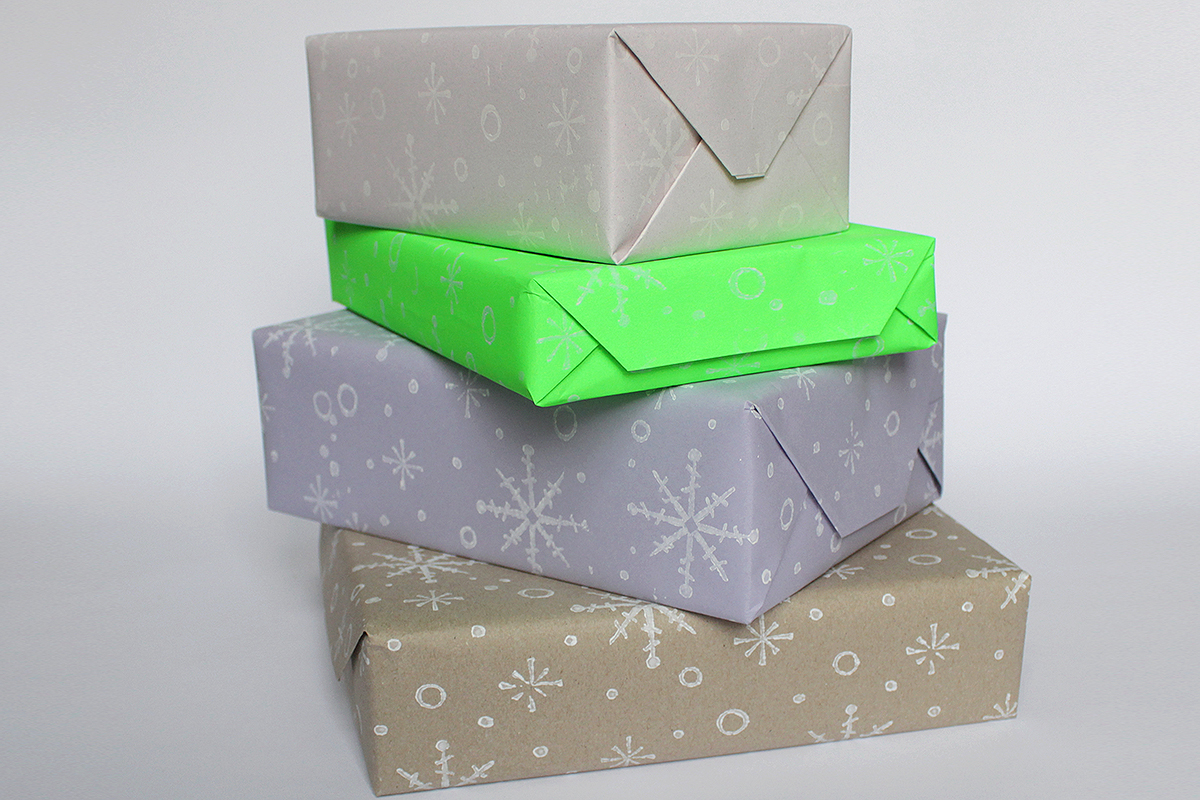
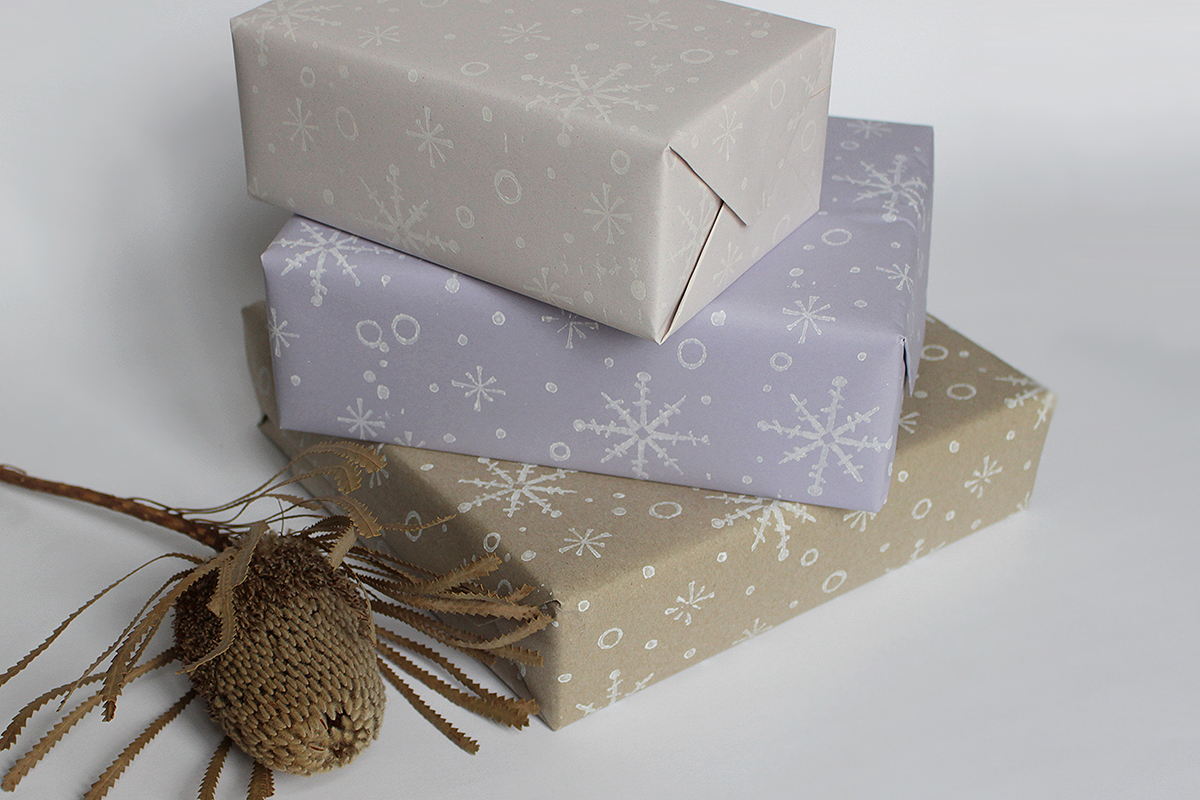
Besides the pattern roller and applicator, you’ll need papers of your choosing. I used SH Recycling Grey in 100 gsm, Crush Grape in 90 gsm, IQ Color Lavender in 80 gsm, and Fluo Poster in neon green 90 gsm – all available by Europapier – for an eclectic mix of classic and contemporary. Lower gsm paper is more suitable for gift wrapping, and the choice of colors can be as creative as you wish. Combining craft paper with gold or red is a classic option for the holidays, but for a more daring touch, don’t be shy to make a statement by using pastels or even bold neon colors. Mixing and matching is always a good idea!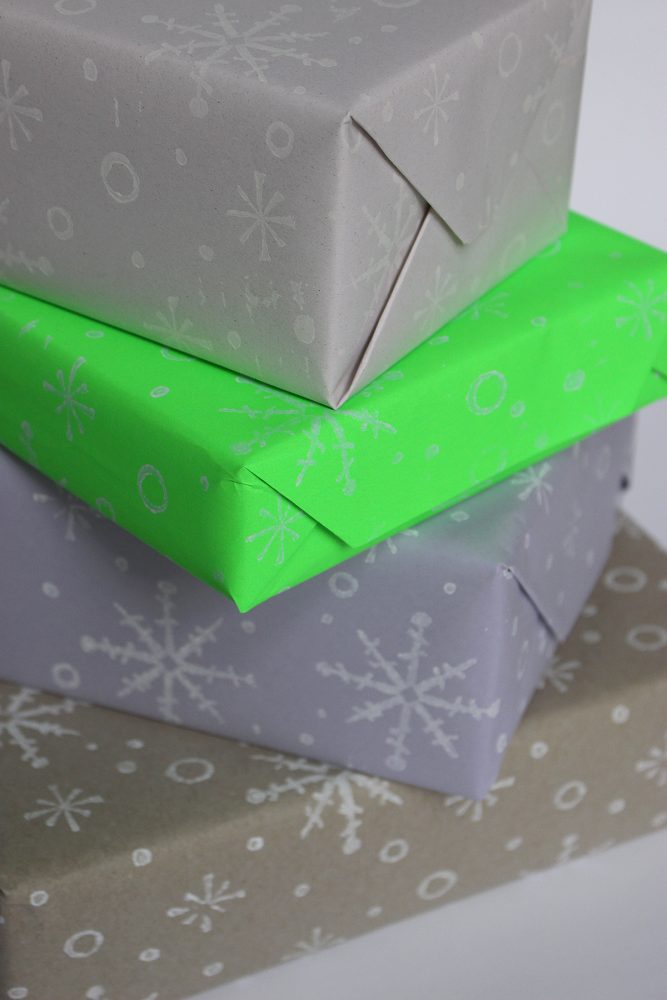
The pattern rollers are perfect for making gift wrapping paper, as once you are all set up, you can create uniform patterns on a large-scale format within minutes.
For the whole project you’ll need:
× pattern roller
× foam paint roller
× applicator
× paper
× acrylic, or other water-based paint
× plastic plate
× a large surface for printing and some areas for drying
× a jolly holiday spirit!
Printing with pattern rollers is easier than it looks. You don’t need to be an artist or a designer, or even be able to draw a straight line to enjoy it and get great results.
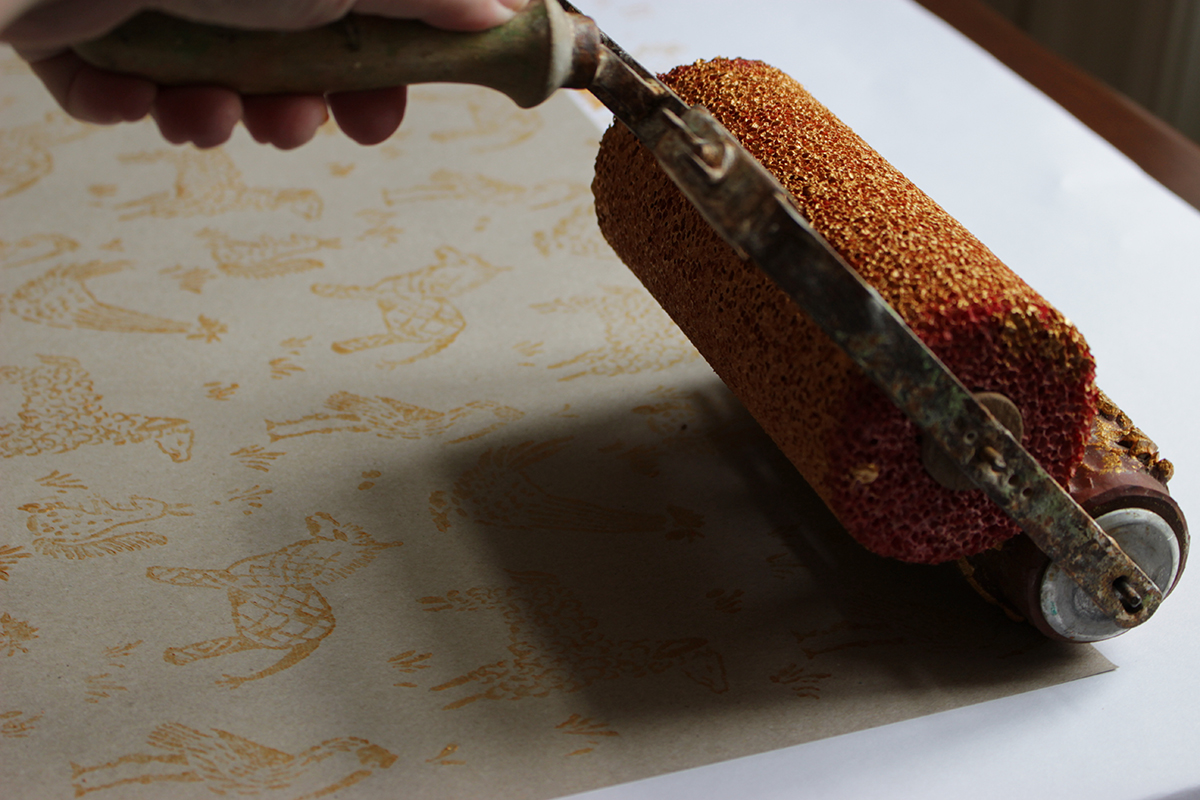
Roll the foam roller in the paint, attach the pattern roller and you’re ready to roll!
Step-by-step instructions for printing your own wrapping paper with printed rollers:
(1) Prepare an area for printing and space where to lay the paper to dry after. As the layer of the paint is so thin, the drying process is very quick.
(2) Attach the foam roller to the applicator. Pour some paint on to a plastic plate and roll the foam roller in it, giving it a nice, even coating. No need to lay it on too thick, just on the surface is enough.
(3) Place the pattern roller to the applicator so that the raised pattern touches the foam paint roller. Roll the applicator on a scrap piece of paper till you can see the paint is transferred evenly, covering the raised pattern.
(4) Make a few test rolls on a scrap piece of paper before starting on the actual pieces (a great way to make some Christmas cards!)
(5) Place the paper on to a large surface, and begin in any corner by using the edge of the paper as your guide. Each pass becomes your guide for the next pass. Allow the passed to overlap slightly, eliminating the appearance of seams.
(6) Place the patterned paper to dry and repeat the process as many times as you want – remember to add paint every 2-3 papers.
And that’s a wrap! All parts are completely washable and re-usable.
You can find more Christmas gift wrapping inspiration here.