
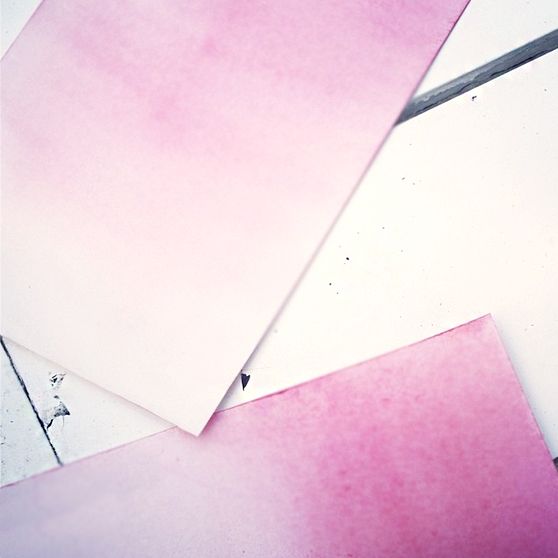
Since I’ve been young I’ve made my Mothers Day cards myself. By scribbling little hearts with crayons or taping flowers to a piece of cardboard, every year I wanted to come up with something new. After having a go at dip dying with the pastel colored Easter eggs last month, I thought of trying the same technique on paper. These pink ombre colored cards look super cute and are very easy and mess-free to make. Hope Mom’s gonna like it! This year happens to be special as I’ll actually be able to spend Mother’s Day with my mother as I am visiting Finland at the moment. It has been years since we’ve been together on this day so I wanted to make it special, just like when I was a kid, making the card myself from scratch. And this year, dying is my chosen technique!
After Easter I already had a pretty good idea how the dying should be done, as I already did it with the Easter eggs. The only difference is the actual color, and making the ombre effect. Last time I used coloring tablets but as they are designed for egg shells they didn’t work so good on paper. But then I heard of trying food coloring. I always love to use simple things that can already be found at the house, and something as simple as food coloring is safe and harmless to use with children as well. I’ve also read about using the same dyes as they use for textiles but because of all the chemicals in them I would not recommend it, especially if crafting with children. The food coloring worked pretty well, quite a bit of dye has to be used, but the effect shows super fast.
I can’t stress it hard enough how simple and fast this is, so let’s start!
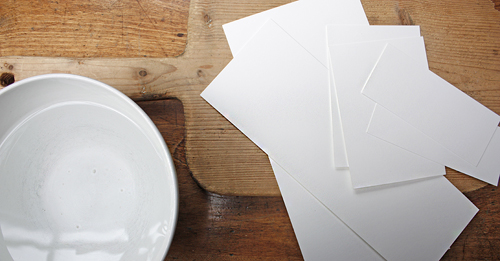
What you’ll need:
Food coloring, sold at grocery stores and supermarkets in the baking and spices aisle. I used the liquid kind, but I’m guessing the others will work as well. Then you’ll need water and a large cup or bowl for it and the paper of your desire. I chose high quality Munken Polar Rough in 300gsm, available at Europapier for its textured feel and look. It holds well and doesn’t break when it gets wet and the edges don’t crumble as easily when it dries, making it prefect for this application.
*Remember to use higher textured papers as they absorb more color. Glossy or coated papers might not give the coveted result. Also a minimum of 250 gsm.
What you’ll do:
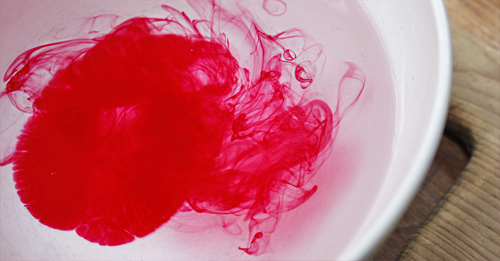
1. Mix the food coloring substance into a large bowl of water. I used about 2 tea spoons for 1.5 litres of water. Mix it to the color of your liking. Remember to check the instructions on the bottle, not all of them are used in the same quantities. A little color goes a long way, but the water should turn a rich color.
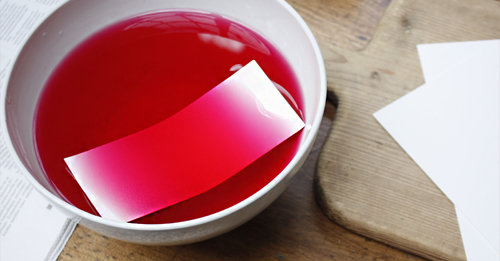
2. When the color of the water is right, start dipping. Holding the paper as straight as possible, dip it in the dye to the desired depth. Either hold the paper in place of let it lay in the water for a while but keep checking the color, and when it looks the way you like pull it out.
3. Hang or place the papers carefully someplace clean to dry. I was working outside and left the paper there so it dried up in 20minutes.
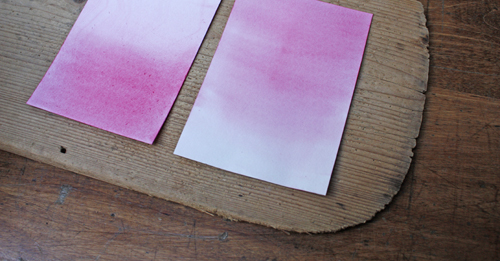
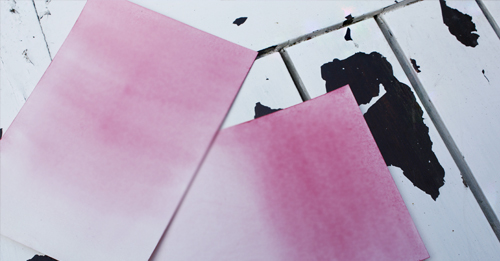
When aiming for an ombre look, there is a few techniques you can try. One way to do it is to dip the paper first for a longer time (approx.1minute), then move the paper down into the dye slightly and hold for a little less time. Example, 1minute, 45 secs, 30secs, 15 secs and only few seconds. Sometimes this way you’ll see more “lines” on the finished paper. Try the moving dipping technique if you wish to achieve a fluently fading ombre color. Simply dip the paper rapidly in the dye, so the end (with the stronger color effect) stays in the dye for the whole time, but the rest is shorter. The only way to describe the technique is that it’s the same as when you are dipping your tea bag in to your tea cup! After a few tries I noticed that if I had a longer strip of paper, I could just leave it in the water and get an ombre look on both ends of the paper (above). Doing this you leave a small amount of the pigmented water on top of the paper when lifting it up, and let it dry like this.
*There is quite a few ways to do this, but the main part is to find a suitable time for the dipping. It depends on the dye and the paper you are using.
4. When the papers are dry, cut them up in the size and form you want to use them in. The color is darker on the edges and the ombre is rarely even, so make sure the papers you use are larger than you wish the card to be in the end. I simply cut off the edges and used the middle part as the card.
Of course you can make anything you wish out of the died papers. Birthday cards, name cards, gift tags etc. They would make lovely hand made personalized business cards with printed text. So many ideas, this might not be the last you see of this technique from me 😉
If you have any questions don’t hesitate to write them in the comments below!