
Easter traditions vary from country to country, and family to family, but many know of the particular way pussy-willows connect to the holiday. Right at Easter, before willow comes to full bloom, its flowers are covered in fine, greyish fur reminiscent of kittens, hence the name, which is why for many, it represents the coming of Spring.
Scandinavian traditions
In my childhood in Finland, the tradition entailed children dressing up as Easter witches or bunnies, going door-to-door in your neighborhood, exchanging self-decorated pussy-willow branches and good-luck chants for treats and sweets. The bigger and more colorful the branch, the more sweets you wanted for it – I still remember some of the rhymes we chanted. A few decades later, pussy-willows still remind me of those times and is heavily connected to Easter celebration. Yet even though I won’t be scaring my neighbors by dressing up in costumes and knocking on doors, nothing stops me from decorating a few willow branches to bring in the festive spirit.
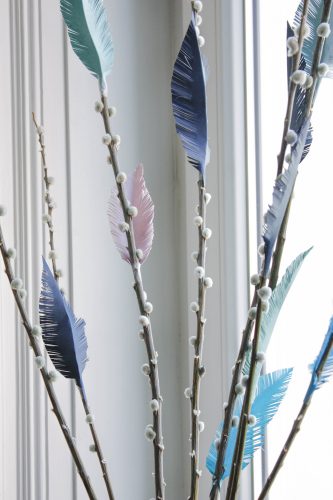
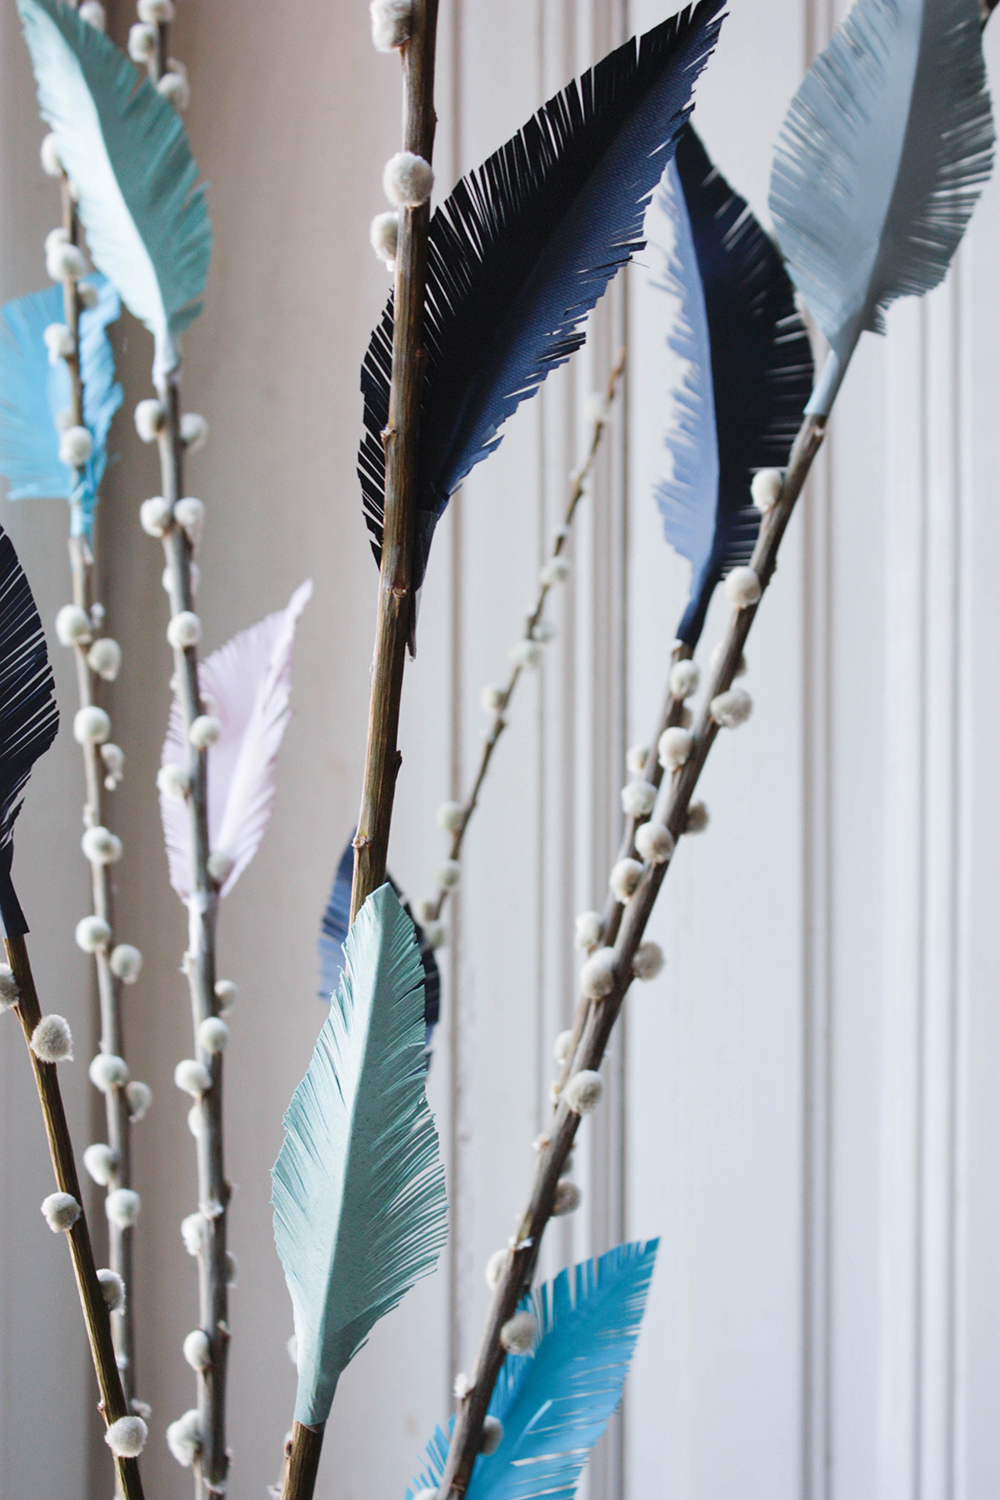
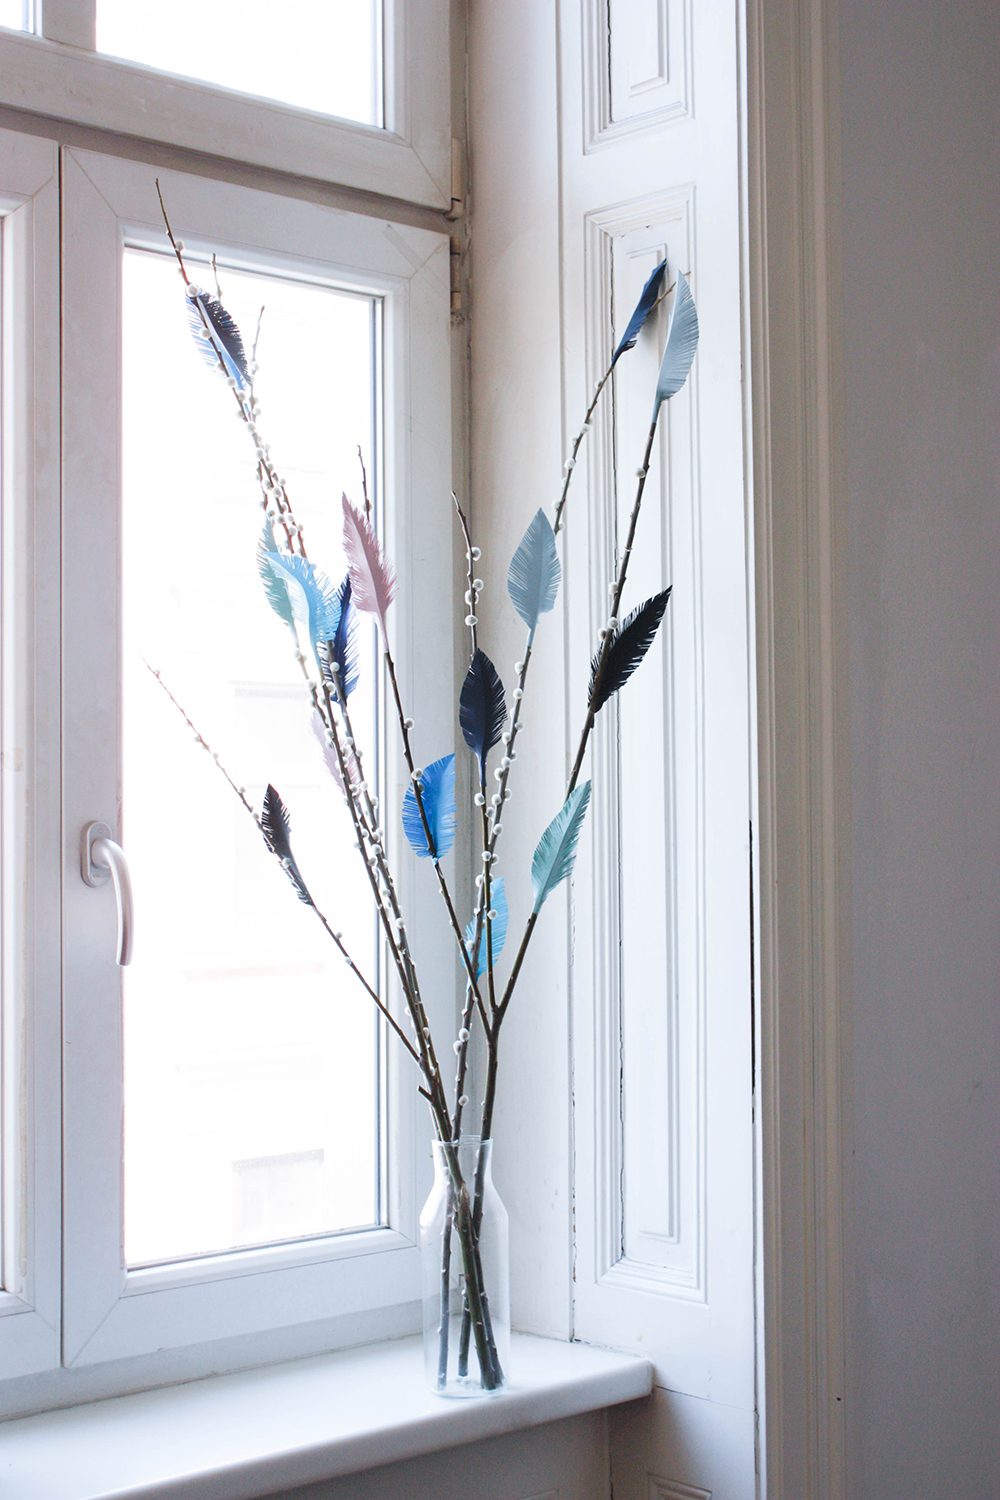
The pussy-willow is in it’s prime around Easter time, sometimes growing up to few meters high, and is traditionally decorated with patterned strings, paper decorations, and brightly colored feathers. To achieve a look more suitable for my current taste, and to suit my fondness of paper, I decided to create feathers out of beautiful papers from the Design Papers collection.
Paper feathers
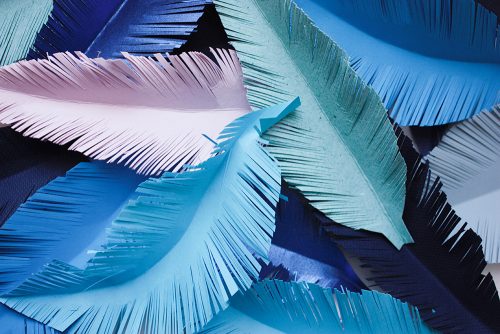
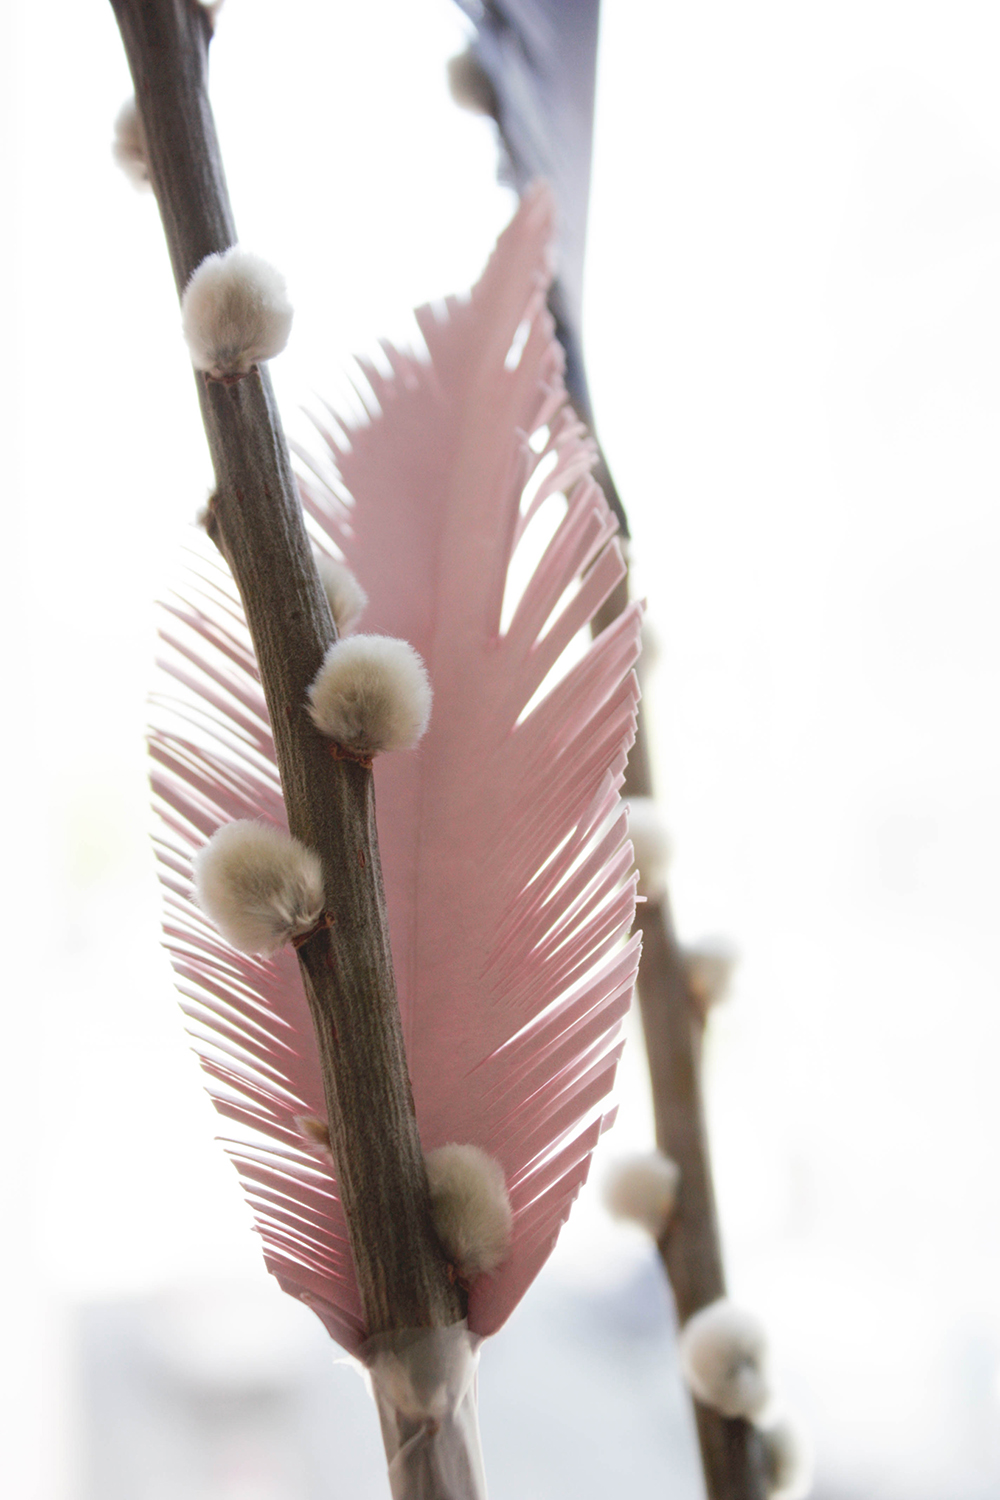
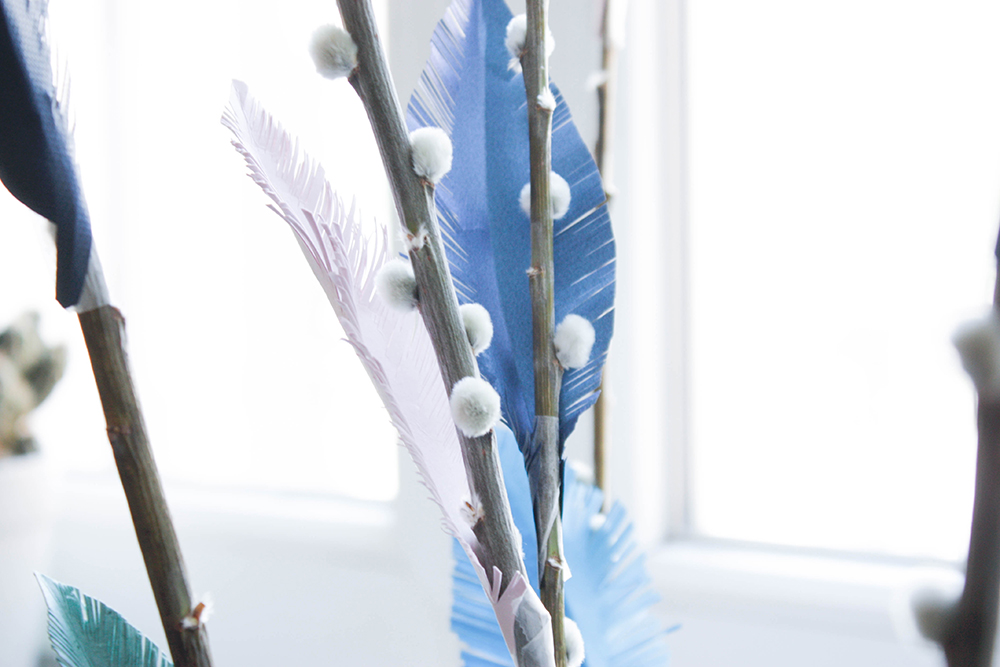
Instead of following the custom of decorating the pussy-willow branches with various brightly colored decorations, I chose to use various shades of blue, inspired by the Inspiration+Paper=Water article from a few weeks ago, while adding a touch of pastel pink for contrast. I used Neobond Blue, Galaxy Metallic Ocean Blue, Classy Covers Cobalt MN, Remake Sky, IQ Color Dark Blue and IQ Color Aqua Blue and Color Style Pastel Pink – all available by Europapier.
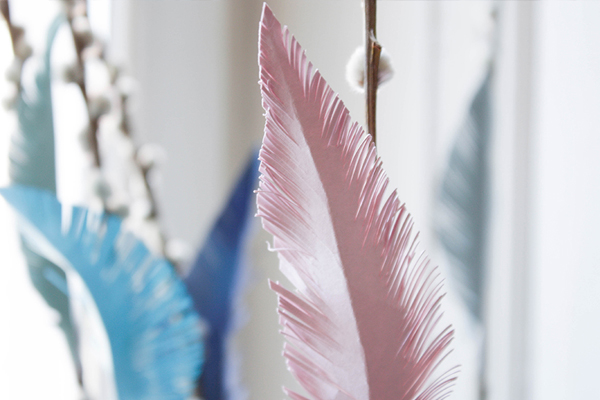
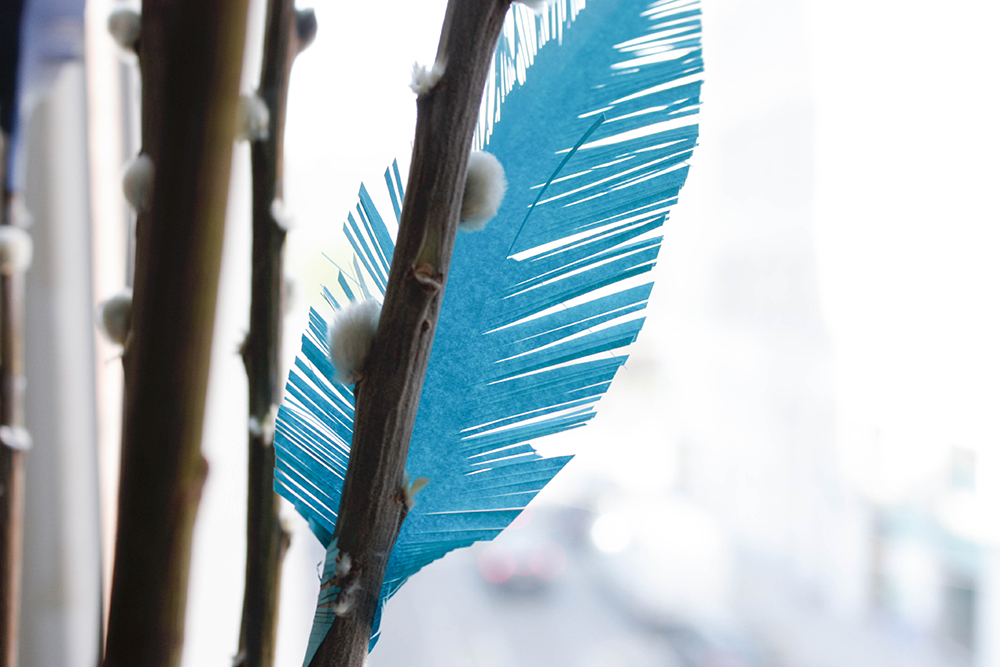
Besides paper, you will need scissors, double-sided tape and willow branches for this project. Start off by cutting out a rough shape of a feather in a size you want, mine was about the size of my palm as my willow branches were over a meter tall. You can freehand it to make all different shapes or sizes, or make a template if you want a uniform size. Remember to leave a short “stem” on one end which will come in handy when it comes to attaching the feathers to the branch.
Now, score along the center of the feather on the back side of the paper and fold it slightly to create a more 3-dimensional shape. Then, with the help of sharp scissors or a crafting knife, make cuts along the sides of the feather. The cuts should be angled towards the tip of the feather, and as close together as possible. No need to worry about consistency, as the more irregular it looks the better! For a more unique look, you can then use scissors to cut a few more “angled” cuts in each feather for a more detailed look.
To attach the feathers to the branch, I used double-sided tape which was strong enough to hold even the thicker papers in place. But you could also use hot glue or even string to wrap the feathers in place. Before attaching the feathers, make a plan to evenly distribute the colors among the branches.
Find more Easter DIY Inspiration here.
Images © Design&Paper